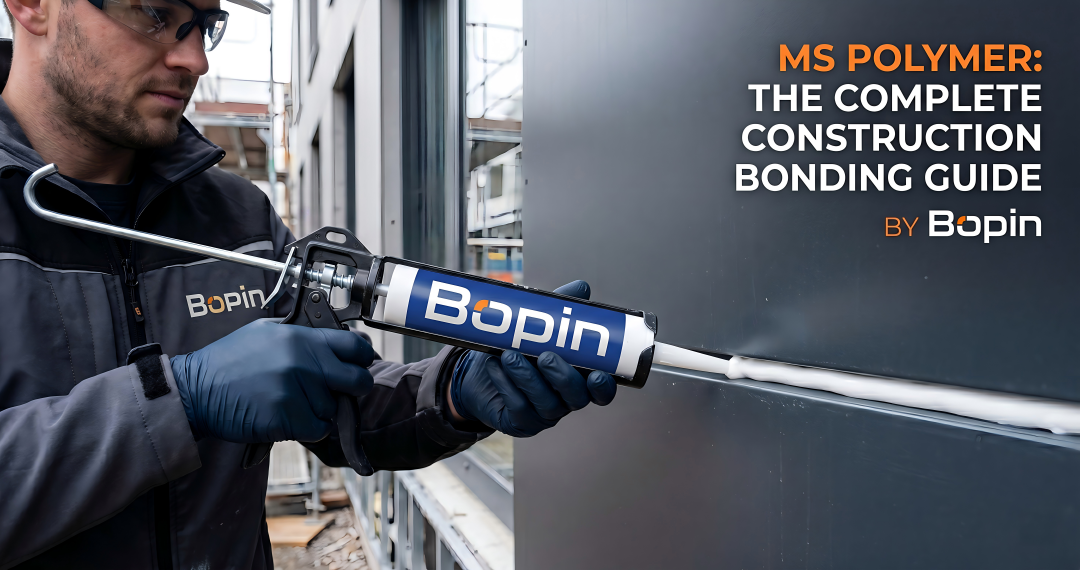
إرشادات الخبراء من شركة BoPin للمواد الكيميائية الإنشائية – إتقان تكنولوجيا المواد اللاصقة الحديثة للربط الدائم
لماذا أحدثت المواد اللاصقة المستخدمة في البناء ثورة في ممارسات البناء الحديثة؟
تجوّل في أي مشروع بناء اليوم وستلاحظ شيئًا لافتًا: استخدام أقل للمثبتات الميكانيكية، وتركيبات أنظف، وروابط أقوى مما كانت تحققه الطرق التقليدية. لقد غيّرت مواد اللصق الحديثة المستخدمة في البناء بشكل جذري طريقة تجميع المباني، وتركيب التشطيبات، وتثبيت المواد الثقيلة.
يتجاوز هذا التحول مجرد سهولة الاستخدام. تعمل تقنية اللصق المتقدمة على توزيع الأحمال على كامل مساحة الربط بدلاً من تركيز الضغط عند نقاط التثبيت. ينتج عن ذلك تجميعات أقوى وأكثر متانة، مع التخلص من الأجزاء المعدنية الظاهرة التي تؤثر على المظهر الجمالي. تتكيف روابط اللصق مع التمدد والانكماش الحراري والاهتزازات دون أن تتفكك مثل أدوات التثبيت الميكانيكية. كما أنها تُحكم الإغلاق أثناء عملية الربط، مما يمنع تسرب الرطوبة الذي يُسبب تلفًا على المدى الطويل.
لكن تحقيق هذه الفوائد يتطلب فهمًا لتقنية المواد اللاصقة وملاءمة المنتجات للتطبيقات المحددة. إن استخدام مواد منع التسرب كمواد لاصقة - أو المواد اللاصقة العامة للتطبيقات الإنشائية - يؤدي إلى أعطال تضر بالمواد والسمعة على حد سواء. تتطلب النتائج الاحترافية اختيار التركيبة الكيميائية المناسبة للمواد اللاصقة، وإعداد الأسطح بشكل صحيح، وتطبيق المنتجات وفقًا للمواصفات المختبرة.
يُقدّم هذا الدليل الشامل كل ما يحتاجه متخصصو البناء لمعرفته حول مواد اللصق الحديثة. ستتعرف على مختلف تقنيات اللصق واستخداماتها المناسبة، وتتعلم أساليب تحضير الأسطح وتطبيقها بشكل صحيح، وتتقن طرق التركيب لضمان روابط موثوقة وطويلة الأمد. سواء كنت تقوم بتركيب ألواح حجرية ثقيلة، أو تركيب مرايا، أو لصق عناصر هيكلية، أو تثبيت أسطح العمل، فإن هذا الدليل يُقدّم لك معلومات عملية لتحقيق نتائج احترافية.
والنتيجة؟ الثقة في تحديد وتطبيق مواد لاصقة البناء التي تخلق روابط دائمة وموثوقة مع تلبية المتطلبات المعقدة لمشاريع البناء الحديثة.
فهم تكنولوجيا المواد اللاصقة المستخدمة في البناء
تمثل المواد اللاصقة الحديثة المستخدمة في البناء تركيبات كيميائية متطورة مصممة خصيصًا لتطبيقات البناء.
ما الذي يميز المواد اللاصقة المستخدمة في البناء عن مواد منع التسرب؟
يخلط العديد من البنائين بين مواد منع التسرب والمواد اللاصقة، إذ تأتي كلتاهما في عبوات متشابهة وتتصلبان عند تعرضهما للرطوبة. إن فهم الاختلافات الأساسية بينهما يجنب أخطاء التطبيق المكلفة.
الغرض من التصميم:
- مواد مانعة للتسرب: صُممت في الأساس لملء الفراغات ومنع تسرب الماء أو الهواء أو المواد الكيميائية. أما الالتصاق فهو ثانوي مقارنةً بملء الفراغات والمرونة.
- المواد اللاصقة: صُممت هذه المادة في الأساس لإنشاء روابط قوية بين المواد. قدرتها على ملء الفراغات محدودة، لكن قوة الربط فيها في أقصى حد.
الخصائص الفيزيائية:
- مواد مانعة للتسرب: استطالة عالية (400-600%+)، معامل مرونة منخفض (ناعم ومرن)، مُحسَّن لاستيعاب الحركة
- المواد اللاصقة: استطالة متوسطة (200-400%)، معامل مرونة أعلى (أكثر صلابة)، مُحسَّن لنقل الأحمال والاستقرار الأبعاد
خصائص القوة:
- مادة مانعة للتسرب من السيليكون نموذجية: قوة شد تتراوح بين 20 و60 رطل لكل بوصة مربعة، وهي كافية للختم ولكنها غير كافية لتحمل الأحمال.
- مادة لاصقة للبناء: قوة شد تتراوح بين 300 و500 رطل لكل بوصة مربعة، مصممة للتطبيقات الهيكلية
- مادة لاصقة بوليمرية عالية القوة من نوع MS: قوة شد تصل إلى 3.0 ميجا باسكال (435 رطل لكل بوصة مربعة) مع تثبيت فوري
تركيز التطبيق:
- مواد مانعة للتسرب: حركة المفاصل، مقاومة العوامل الجوية، حواجز الرطوبة
- المواد اللاصقة: نقل الأحمال، التجميع الدائم، الربط الهيكلي
هل يمكن للمواد المانعة للتسرب أن تربط المواد ببعضها؟ نعم، إلى حد ما. هل ينبغي استخدام مواد منع التسرب كمواد لاصقة أساسية؟ نادراً ما يحدث ذلك. ففرق القوة يعني أن ما يبدو كافياً في البداية يفشل تحت تأثير الأحمال المستمرة أو دورات الإجهاد.
تقنية البوليمر MS: ثورة المواد اللاصقة
تمثل المواد اللاصقة البوليمرية المعدلة بالسيليان (MS) أهم تقدم في تكنولوجيا المواد اللاصقة المستخدمة في البناء منذ عقود.
كيف تعمل المواد اللاصقة البوليمرية MS:
تجمع بوليمرات MS بين سلاسل أساسية من البولي إيثر المعدلة بمجموعات السيلان التفاعلية. أثناء المعالجة بالرطوبة، تتشابك مجموعات السيلان هذه لتكوين شبكات ثلاثية الأبعاد توفر المرونة والقوة معًا - وهي خصائص يصعب تحقيقها في آن واحد.
لماذا أحدثت بوليمرات MS ثورة في مجال الربط الإنشائي؟
يزيل الإيزوسيانات: تحتوي المواد اللاصقة التقليدية المصنوعة من البولي يوريثان على إيزوسيانات تتطلب عناية فائقة عند التعامل معها، كما أنها تثير مخاوف صحية. أما بوليمرات MS فتُقدم أداءً مماثلاً أو أفضل دون استخدام الإيزوسيانات.
التوافق مع المواد العالمية: تلتصق بوليمرات MS بجميع مواد البناء تقريبًا دون الحاجة إلى مواد أولية في معظم الحالات - المعادن والحجر والخشب والخرسانة والزجاج ومعظم أنواع البلاستيك والمواد المركبة.
انكماش صفري: على عكس بعض المواد اللاصقة التقليدية التي تنكمش أثناء التصلب وتُسبب إجهادًا، تحافظ بوليمرات MS على ثبات أبعادها. وهذا أمر بالغ الأهمية للتركيبات الدقيقة والتطبيقات التي تتضمن موادًا مختلفة.
المقاومة البيئية: إن مقاومة الأشعة فوق البنفسجية الممتازة، ومتانة مقاومة العوامل الجوية، ومقاومة المواد الكيميائية تجعل بوليمرات MS مناسبة للاستخدامات الداخلية والخارجية على حد سواء دون تدهور.
قوة الإمساك الفورية: توفر التركيبات المتقدمة قوة تماسك أولية تتجاوز 75 كجم/م²، مما يلغي الحاجة إلى الدعامات المؤقتة في العديد من التطبيقات. وهذا يُسرّع عملية التركيب ويقلل تكاليف العمالة بشكل كبير.
منتجات مثل لاصق البناء عالي القوة BoPin MS-850 تجسد هذه المادة تكنولوجيا البوليمر MS الحديثة بقوة نهائية تبلغ 3.0 ميجا باسكال، وقبضة فورية، وأداء مثبت في تطبيقات البناء المتنوعة.
المواد اللاصقة التقليدية المصنوعة من البولي يوريثان: فهم البدائل
سيطرت المواد اللاصقة الإنشائية القائمة على البولي يوريثان على السوق قبل ظهور تقنية البوليمر MS، ولا تزال شائعة الاستخدام في تطبيقات محددة.
خصائص الأداء:
- قوة نهائية عالية جدًا (مقارنة ببوليمرات MS)
- قدرة ممتازة على ملء الفراغات (يتمدد أثناء المعالجة)
- التصاق فائق بالخشب والمواد المسامية
- يعمل على الأسطح الرطبة (الرطوبة في الواقع تسرع عملية التصلب)
القيود والمخاوف:
- يحتوي على إيزوسيانات تتطلب عناية خاصة عند التعامل معه.
- قد يؤدي الإفراط في استخدام المادة الرغوية أثناء عملية المعالجة إلى تباعد المواد.
- بعض التركيبات تصفر أو تتلف عند تعرضها للأشعة فوق البنفسجية
- يتطلب التنظيف استخدام المذيبات قبل المعالجة؛ والإزالة الميكانيكية بعد ذلك.
أفضل استخدامات المواد اللاصقة المصنوعة من البولي يوريثان:
- أعمال البناء الخشبي والنجارة
- التطبيقات التي تتطلب توسيعًا لملء الفجوات
- الحالات التي يكون فيها ربط الركيزة الرطبة ضروريًا
- التطبيقات الداخلية التي لا يمثل فيها التعامل مع الإيزوسيانات مشكلة
لماذا تحل بوليمرات MS محل البولي يوريثان بشكل متزايد؟ بفضل مزاياها الصحية والسلامة، وسهولة استخدامها، ومقاومتها الفائقة للظروف البيئية، تُعدّ بوليمرات MS الخيار الأمثل لمعظم مواد الربط في الإنشاءات الحديثة. أما البولي يوريثان، فيظلّ ذا أهمية بالغة في تطبيقات الأخشاب وحالات ملء الفراغات.
الخصائص الأساسية للأداء
يساعد فهم المواصفات الرئيسية في مطابقة قدرات المواد اللاصقة مع متطلبات التطبيق.
قوة الإمساك الأولية مقابل قوة الترابط النهائية
تتميز المواد اللاصقة الاحترافية بقياسين مختلفين للقوة يخدمان أغراضًا مختلفة.
قوة الإمساك الأولية: يقيس هذا المقياس قدرة المادة اللاصقة على تثبيت المواد في مكانها فور ملامستها، قبل اكتمال عملية التصلب. ويُعبّر عنه بوحدة كجم/م² أو نيوتن/م²، ويشير إلى ما إذا كانت هناك حاجة إلى دعامات مؤقتة أثناء التركيب.
المواد اللاصقة القياسية المستخدمة في البناء: قوة تثبيت أولية من 20 إلى 40 كجم/م² (عادةً ما تكون هناك حاجة إلى دعامات مؤقتة) مواد لاصقة عالية الأداء: قوة تثبيت أولية تزيد عن 75 كجم/م² (غالباً ما تلغي الحاجة إلى الدعم المؤقت)
لماذا تُعدّ عملية الاستحواذ الأولية مهمة؟
- يلغي أو يقلل من أنظمة التدعيم والدعم المؤقتة
- يُسرّع عملية التثبيت من خلال السماح بالانتقال الفوري إلى الخطوات التالية
- يقلل من تكاليف العمالة المرتبطة بتركيب وإزالة الدعامات
- يتيح تركيبات السقف والعلوية دون الحاجة إلى تجهيزات معقدة
قوة الترابط النهائية: يقيس هذا الاختبار قوة الشد أو القص القصوى للمادة اللاصقة بعد تصلبها بالكامل، والتي تُقاس عادةً بوحدة ميجا باسكال أو رطل لكل بوصة مربعة. وتتطور القوة النهائية خلال 24-72 ساعة حسب التركيبة والظروف.
المواد اللاصقة القياسية المستخدمة في البناء: 1.5-2.0 ميجا باسكال (220-290 رطل لكل بوصة مربعة) تركيبات عالية الفعالية: 2.5-3.0 ميجا باسكال (360-435 رطل لكل بوصة مربعة) المواد اللاصقة الهيكلية: 3.5+ ميجا باسكال (500+ رطل لكل بوصة مربعة)
الجدول الزمني لتطوير القوة:
بالنسبة لمعظم المواد اللاصقة المستخدمة في البناء:
- 15 دقيقة: التثبيت الأولي، المواد مثبتة في مكانها
- 1-2 ساعة: قوة كافية للتعامل الدقيق
- 24 ساعة: تم تحقيق قوة نهائية تتراوح بين 50 و70%
- 72 ساعة: اكتمال نمو القوة الكاملة
تؤثر درجة الحرارة والرطوبة بشكل كبير على هذا الجدول الزمني. تؤدي الظروف الباردة إلى إطالة أوقات المعالجة بشكل كبير؛ بينما تعمل الظروف الدافئة والرطبة على تسريع تطور القوة.
أوقات العمل ومواعيد فتح الأبواب
أوقات العمل: فترة ما بعد التطبيق التي لا تزال فيها المواد قابلة للالتصاق بفعالية. يبقى اللاصق رطباً بدرجة كافية لخلق تلامس جيد مع السطح والتصاق قوي.
أوقات العمل المعتادة:
- تركيبات سريعة الجفاف: 5-10 دقائق
- مدة صلاحية المنتجات القياسية: 10-20 دقيقة
- تركيبات ذات وقت فتح ممتد: 20-30 دقيقة أو أكثر
أوقات العمل: الفترة التي تلي عملية الربط والتي يمكن خلالها تعديل المواد أو إعادة وضعها دون المساس بقوة الربط النهائية.
أوقات العمل المعتادة:
- إعداد سريع: من 2 إلى 5 دقائق
- المدة القياسية: 5-10 دقائق
- مدة العمل الممتدة: 10-20 دقيقة
لماذا تُعدّ هذه الفروقات مهمة؟
تتطلب الألواح الكبيرة أو التجميعات المعقدة أوقات عمل طويلة لضمان المحاذاة الصحيحة. أما المنتجات سريعة التثبيت فهي مثالية للأجزاء الصغيرة أو عندما تكون السرعة عاملاً حاسماً. إن مطابقة خصائص المنتج مع مدى تعقيد التركيب تمنع العمل المتسرع الذي يؤثر سلباً على الجودة.
العوامل البيئية التي تؤثر على أوقات العمل:
- درجة حرارة: درجات الحرارة المرتفعة تقلل الأوقات؛ والبرودة تطيلها
- رطوبة: يُسرّع من تصلب المواد اللاصقة التي تتصلب بالرطوبة؛ بينما تُبطئ الظروف الجافة جدًا عملية التصلب.
- مسامية الركيزة: تمتص المواد المسامية الرطوبة، مما يقلل من وقت العمل المتاح
- سُمك المادة اللاصقة: تحتفظ الخرزات السميكة بقابلية التشغيل لفترة أطول من الأغشية الرقيقة
القدرة على سد الثغرات
سد الثغرات يشير ذلك إلى قدرة المادة اللاصقة على سد الفراغات بين المواد الأساسية والحفاظ على قوة الترابط عبر الفجوات.
مواد لاصقة بوليمرية من نوع MS: عادةً ما يكون ملء الفراغات فعالاً من 3 إلى 6 ملم مواد لاصقة قابلة للتمدد من البولي يوريثان: ملء الفراغات حتى 20 مم المواد اللاصقة الإيبوكسية: عادةً أقل من 3 مم (في تطبيقات الطبقة الرقيقة)
لماذا توجد قيود على سد الثغرات؟
تكتسب المواد اللاصقة قوتها من خلال التلامس مع الركيزة والترابط الكيميائي. في الفجوات الكبيرة، يجب أن تدعم المادة اللاصقة نفسها هيكليًا مع تكوين روابط في الوقت نفسه. عند تجاوز السماكة المثلى، تصبح قوة التماسك الداخلي هي العامل المحدد بدلًا من قوة الالتصاق.
الآثار العملية:
- تساهم الأسطح المستوية والملائمة جيدًا في زيادة أداء الالتصاق إلى أقصى حد.
- تتطلب الفجوات التي تتجاوز قدرات الالتصاق استخدام حشوات أو دعامات ميكانيكية.
- قد تحتاج الأسطح غير المنتظمة إلى اختيار مادة لاصقة بناءً على قدرتها على ملء الفراغات بدلاً من قوتها المطلقة.
- يؤدي استخدام سماكة لاصقة مفرطة لتعويض سوء التركيب إلى هدر المواد دون تحسين المتانة.
التطبيقات وتقنيات التركيب
تتطلب التطبيقات المختلفة أساليب وتقنيات لاصقة محددة.
تركيب الألواح الثقيلة
إن تركيب الألواح - سواء كانت قشرة حجرية أو بلاط كبير الحجم أو تكسية معدنية أو ألواح معمارية - يمثل تحديًا لكل من تقنية المواد اللاصقة ومهارة التركيب.
حسابات الأحمال ومتطلبات المواد اللاصقة:
حساب وزن اللوحة: الوزن = المساحة × السماكة × كثافة المادة
مثال: لوح جرانيت بأبعاد 1.2 متر × 0.8 متر × سماكة 30 ملم
- المساحة: 0.96 متر مربع
- الحجم: 0.96 × 0.03 = 0.0288 م³
- كثافة الجرانيت: حوالي 2700 كجم/م³
- الوزن: 0.0288 × 2700 = 78 كجم (~172 رطلاً)
قوة الالتصاق المطلوبة: بالنسبة للوحة وزنها 78 كجم بمعامل أمان 4:
- قوة التحمل المطلوبة: 312 كجم
- المساحة المغطاة بالمادة اللاصقة (تغطية 75%): 0.72 متر مربع
- قوة القص اللاصقة المطلوبة: 312/0.72 = 433 كجم/م² كحد أدنى
المواد اللاصقة عالية القوة مثل بوبين MS-850 مع قوة تماسك أولية تزيد عن 75 كجم/م² وقوة نهائية تبلغ 3.0 ميجا باسكال، تتجاوز هذه المتطلبات بسهولة مع التخلص من الحاجة إلى الدعم المؤقت.
نمط التطبيق للوحات:
ألواح خفيفة الوزن (<5 كجم/م²):
- خرز عمودي بمسافة 30 سم
- الحد الأدنى لتغطية السطح 25%
- خرزة محيطية بالإضافة إلى دعامة مركزية
ألواح متوسطة الوزن (5-15 كجم/م²):
- خرز عمودي بمسافة 20 سم
- الحد الأدنى لتغطية السطح 50%
- محيط كامل بالإضافة إلى نمط شبكي
الألواح الثقيلة (>15 كجم/م²):
- خرز عمودي بمسافة 10 سم
- الحد الأدنى لتغطية السطح 75%
- محيط كامل بالإضافة إلى نمط شبكي كثيف
إجراءات التثبيت:
- التحقق من الركيزة: تأكد من أن الجدار مستقيم، وسليم من الناحية الهيكلية، وقادر على تحمل وزن الألواح بالإضافة إلى أحمال المواد اللاصقة
- تركيب الألواح بدون تركيب مسبق: قم بتجربة تركيب الألواح للتحقق من الأبعاد وتحديد أي عيوب تتطلب تصحيحًا
- تحضير السطح: نظّف كلاً من الجزء الخلفي للوحة والسطح السفلي جيداً. أزل الغبار والزيوت ومواد الفصل والملوثات.
- طريقة استخدام المادة اللاصقة: استخدمي الخرز العمودي حسب متطلبات التصميم. بالنسبة للألواح السميكة، اعملي على أجزاء مع مراعاة وقت الفتح.
- تسلسل الضغط: اضغط اللوحة بقوة على السطح، ثم اسحبها قليلاً (1-2 سم) لكشف المادة اللاصقة للهواء، ثم اضغطها مرة أخرى في موضعها النهائي واضغط عليها بقوة لمدة 10-15 ثانية.
- التحقق من المحاذاة: تأكد من استواء السطح وعموديته فورًا بعد وضع المنتج في مكانه. اضبطه خلال فترة العمل المحددة.
- توقيت إزالة الدعامات: في حال استخدام دعامات مؤقتة، يجب إزالتها فقط بعد مرور وقت كافٍ للتصلب وفقًا لمواصفات الشركة المصنعة.
اعتبارات خاصة بالأحجار الطبيعية:
تمتص بعض الأحجار المسامية الرطوبة من المادة اللاصقة، مما قد يؤثر على عملية التصلب. بالنسبة للمواد الحساسة:
- استخدم مواد لاصقة منخفضة المحتوى المائي
- ضع في اعتبارك سد الجزء الخلفي من الحجر المسامي
- اختبر قوة الالتصاق على الحجر الفعلي قبل التركيب الكامل
- زيادة وقت المعالجة المتوقع للمواد الثقيلة والمسامية
تركيب المرايا وتركيب الزجاج
يمثل تركيب المرايا تحديات فريدة لأن أدوات التثبيت الميكانيكية القياسية غير مناسبة، كما أن دعامة المرآة حساسة للهجوم الكيميائي.
لماذا تتطلب المرايا مواد لاصقة متخصصة؟
حساسية المرآة الخلفية: تتسبب المواد اللاصقة التقليدية المصنوعة من البولي يوريثان أو المذيبات في تلف طبقة الفضة الموجودة على ظهر المرايا، مما يؤدي إلى ظهور بقع سوداء قبيحة أو تلف الطبقة بالكامل. ولا تمنع هذا التلف إلا المواد اللاصقة المتوافقة كيميائياً.
متطلبات استقرار الأبعاد: المرايا صلبة وغير مرنة. يجب أن يجف اللاصق دون انكماش مفرط قد يتسبب في انبعاج المرآة أو تشققها.
مقاومة الرطوبة: تتعرض مرايا الحمامات لرطوبة عالية يمكن أن تؤثر على أداء المواد اللاصقة على المدى الطويل إذا كانت مقاومة الرطوبة غير كافية.
مزايا بوليمر MS لتركيب المرايا:
المواد اللاصقة البوليمرية MS مثل بوبين MS-850 آمنة تمامًا للاستخدام كطبقة خلفية للمرايا، ولا تنكمش أثناء المعالجة، وتحافظ على أدائها في البيئات الرطبة إلى أجل غير مسمى.
تقنية تركيب المرايا الاحترافية:
اختيار النمط:
- لا تضع المادة اللاصقة في طبقة متصلة (فهذا يمنع وصول الرطوبة اللازمة للتصلب).
- استخدم نمط الشرائط العمودية: خرز بعرض 50 مم، بمسافة 150-200 مم بين الخرز.
- تأكد من عدم امتداد المادة اللاصقة إلى حواف المرآة حيث قد تكون مرئية
خطوات التقديم:
- قم بالقياس ووضع العلامات: حدد موضع المرآة بدقة على الحائط وضع علامة على محيطها
- تجهيز الجدار: تأكد من أن الجدار نظيف وجاف ومستوٍ وسليم إنشائيًا. قم بتجهيز الأسطح المسامية وفقًا لتوصيات الشركة المصنعة للمادة اللاصقة. قم بتجهيز الأسطح المسامية وفقًا لتوصيات الشركة المصنعة للمادة اللاصقة.
- طريقة استخدام المادة اللاصقة: قم بتثبيت الشرائط العمودية على الحائط أو خلف المرآة (وليس كليهما). بالنسبة للمرايا الكبيرة، قم بتثبيتها على الحائط لتحكم أفضل.
- تحديد الموقع: ضع المرآة بعناية، وتأكد من محاذاتها بشكل صحيح قبل الضغط عليها.
- تقنية الضغط: اضغط بقوة على كامل سطح المرآة، بدءًا من المركز والتحرك للخارج لإزالة الفراغات
- دعم مؤقت: حتى مع قوة التماسك الأولية العالية، يجب دعم المرايا الكبيرة (أكبر من 0.5 متر مربع) بدعامات مؤقتة لمدة 24-48 ساعة حتى تكتسب القوة اللازمة.
- مدة المعالجة: انتظر 72 ساعة قبل إزالة أي دعامات أو تعريض المرآة للضغط
إرشادات حول حجم المرآة وكمية المادة اللاصقة:
| حجم المرآة | شرائط لاصقة | الكمية التقريبية من المادة اللاصقة المطلوبة |
|---|---|---|
| صغير (<0.5 متر مربع) | 3-4 شرائط عمودية | خرطوشة واحدة |
| متوسط (0.5-1.5 متر مربع) | 5-8 شرائط عمودية | 1-2 خرطوشة |
| كبير (1.5-3 متر مربع) | 8-12 شريطًا رأسيًا | 2-3 خراطيش |
| كبير جدًا (>3 أمتار مربعة) | أكثر من 12 شريطًا رأسيًا | 3+ خراطيش |
تركيب أسطح العمل ودرجات السلالم
يمثل الربط السطحي الأفقي تحديات مختلفة عن التطبيقات الرأسية، لا سيما بالنسبة للمواد التي تتعرض لأحمال مباشرة وتأثير محتمل.
تركيب أسطح مطابخ من الحجر:
متطلبات الركيزة:
- قاعدة مسطحة ومستوية (بحد أقصى تفاوت 3 مم لكل متر)
- دعم هيكلي كافٍ (خشب رقائقي بسماكة 19 مم كحد أدنى أو ما يعادله)
- سطح نظيف وجاف وخالٍ من الملوثات
طريقة استخدام المواد اللاصقة لأسطح العمل:
- خرزة محيطية متصلة على بعد 25 مم من الحواف
- نمط شبكي داخلي مع خرزات متباعدة بمسافة 150-200 مم
- تُزود محيطات فتحة الحوض بمادة لاصقة إضافية للدعم.
- تغطية إجمالية تقارب 60-70% من مساحة سطح الطاولة
تقنية ربط اللحامات:
بالنسبة لأسطح العمل متعددة القطع ذات الفواصل الميدانية:
- ضع المادة اللاصقة على كل من الركيزة والجزء الأول من سطح العمل.
- حدد موضع القسم الأول بدقة
- ضع مادة لاصقة خاصة بالأحجار أو راتنج البوليستر على حافة التماس
- Position second section, ensuring tight seam contact
- Install seam clamps to maintain pressure during cure
- Clean excess adhesive from seam immediately
- Allow full cure before removing clamps (minimum 24 hours)
Stair tread installation:
Stair treads experience both vertical loads and horizontal shear forces from foot traffic. Adhesive must resist both force directions.
Application pattern:
- Full perimeter bead
- Cross-grain beads every 150mm
- Avoid continuous longitudinal beads that could create slip planes
- Minimum 50% coverage for residential; 70% for commercial applications
Structural Element Bonding
Some construction adhesives are rated for structural applications where they partially or fully replace mechanical fasteners in load-bearing assemblies.
Applications include:
- Subfloor gluing to floor joists
- Wall sheathing bonding to framing
- Roof decking attachment
- Structural panel bonding
- Load-bearing beam splicing (with engineered approval)
Critical requirements for structural bonding:
Engineering approval: Structural adhesive applications require engineering calculations and approvals. Building codes specify when and how adhesives can replace or supplement mechanical fasteners.
Quality control: Structural applications demand rigorous quality control including:
- Verified surface preparation procedures
- Environmental condition monitoring
- Application technique verification
- Strength testing of cure samples
- Documentation of all installation parameters
Backup mechanical fastening: Most structural codes require mechanical fasteners as backup even when adhesive provides primary bonding. This creates redundant load paths for safety.
Liability considerations: Professional structural bonding requires appropriate liability insurance, engineering oversight, and strict adherence to tested, approved systems.
Most construction professionals should limit adhesive use to non-structural applications unless specifically trained, insured, and operating under engineering guidance for structural bonding.
Surface Preparation: The Foundation of Successful Bonding
Surface preparation determines 70-80% of adhesive bond success. No amount of product quality compensates for contaminated or improperly prepared surfaces.
Cleaning Requirements by Substrate Type
Metals (aluminum, steel, stainless steel):
- Remove manufacturing oils, cutting fluids, and handling residues
- Clean with isopropyl alcohol, MEK, or manufacturer-recommended solvents
- For painted or coated metals, verify coating adhesion and compatibility
- Some applications benefit from light abrasion for mechanical bonding
- Allow complete solvent evaporation before adhesive application
Natural stone (granite, marble, limestone):
- Remove all dust, particularly from saw cutting or grinding
- Clean with pH-neutral stone cleaner (avoid acidic products on limestone/marble)
- Verify stone is completely dry (moisture meters help confirm)
- Check for sealers or treatments that might block adhesion
- اختبر قوة الالتصاق على الحجر الفعلي قبل التركيب الكامل
Engineered stone and solid surface materials:
- Remove fabrication dust and residues
- Clean with mild detergent and water
- Light abrasion with 80-120 grit improves bonding
- Wipe with isopropyl alcohol as final step
- Follow material manufacturer recommendations for adhesive compatibility
الخرسانة والبناء:
- Remove laitance, dust, and loose material (wire brush or grinding)
- Repair any damaged or deteriorated areas before bonding
- Prime porous surfaces per adhesive manufacturer specifications
- Ensure complete primer dry time before adhesive application
- Concrete must be fully cured (28 days minimum for standard concrete)
Wood and wood composites:
- Remove sawdust, oils, and handling residues
- Ensure wood moisture content is appropriate (typically <15%)
- Light sanding may improve adhesion on hard, dense woods
- Avoid over-sanding that opens excessive porosity
- Some woods (teak, ipe, oily exotics) require special preparation
Glass and glazed ceramics:
- Clean with glass cleaner or isopropyl alcohol
- Ensure complete removal of release agents, labels, or protective coatings
- Verify surface is completely dry
- Avoid touching cleaned surfaces with bare hands
- These surfaces usually require no abrasion or primers
Plastics and composites:
- Identify plastic type (some don’t bond well without primers)
- Remove mold release agents and surface treatments
- Light abrasion improves bonding on many smooth plastics
- Test adhesion before committing to full installation
- PE, PP, and PTFE require primers or plasma treatment for bonding
Surface Dryness and Contamination
Moisture content affects adhesive performance significantly:
Most construction adhesives specify application to dry surfaces. Even small amounts of surface moisture can:
- Dilute adhesive at the interface, reducing initial tack
- Create bubbles during cure that weaken bonds
- Prevent proper wetting and adhesion development
- Extend cure times unpredictably
Testing surface moisture:
- Visual inspection (darker color indicates moisture)
- Plastic sheet test (tape plastic to surface; condensation after 24 hours indicates excessive moisture)
- Moisture meters provide quantitative measurements
- When uncertain, allow additional drying time
Oil and grease contamination:
Invisible oil residues from handling or manufacturing prevent adhesive wetting and create catastrophic adhesion failures. Cleaning protocols must effectively remove oils:
- Solvent cleaning (isopropyl alcohol minimum; MEK for heavy contamination)
- Multiple cleaning passes with fresh solvent and clean cloths
- Visual evidence of contamination (cloth shows residue)
- Allow complete solvent evaporation before adhesive application
Dust and particulates:
Even thin dust layers create weak interfaces that fail under stress:
- Vacuum before solvent cleaning
- Compressed air removes particles from porous surfaces
- Tack cloths capture fine dust on smooth surfaces
- Verify cleanliness visually before proceeding
Climate and Environmental Considerations
Temperature, humidity, and atmospheric conditions significantly affect adhesive performance.
Hot Climate Applications (Middle East, North Africa)
Extreme heat creates unique challenges for adhesive installation and long-term performance.
Temperature effects on application:
Surface temperatures exceeding 40°C:
- Accelerated open time (adhesive skins over faster)
- Reduced working time (cure progresses rapidly)
- Potential for adhesive flowing or sagging on vertical surfaces
- Faster strength development but requires adjusted handling
Application timing strategies:
- Schedule installations for early morning or late afternoon
- Avoid midday work when surfaces reach maximum temperatures
- Store adhesive materials in shaded, cooler areas
- Bring materials to moderate temperature before use
Long-term performance considerations:
Quality MS polymer adhesives maintain properties from -40°C to +90°C, adequate for virtually all building envelope applications in desert climates. However, direct exposure to extreme heat requires verification of temperature ratings for specific applications.
Products like BoPin MS-850 provide reliable performance throughout desert temperature ranges with proven adhesion in extreme conditions.
Tropical and Humid Climates (Southeast Asia, Coastal Regions)
High humidity presents advantages and challenges for moisture-cure adhesives.
Humidity benefits:
- Faster cure times due to abundant atmospheric moisture
- More forgiving of minor surface moisture
- Consistent cure conditions year-round
- Reduced need for supplemental moisture addition
Potential issues:
- Accelerated cure reduces working time
- Monsoon rains can disrupt outdoor installations
- High humidity promotes biological growth on contaminated surfaces
- Coastal salt exposure requires enhanced chemical resistance
Best practices for humid tropics:
- Plan installations around weather patterns and forecasts
- Work efficiently to complete bonding within reduced working times
- Ensure exceptional surface cleanliness to prevent biological issues
- Select products with proven performance in tropical conditions
- Allow adequate cure time before heavy loads despite fast early strength development
Cold Continental Climates (Central Asia, Northern Regions)
Cold temperatures slow cure reactions and reduce initial tack, requiring adjusted procedures.
Temperature limitations:
Most construction adhesives specify minimum +5°C to +10°C application temperature. Below these thresholds:
- Cure times extend dramatically (2-4× normal duration)
- Initial grab strength may be insufficient for vertical applications
- Final strength development requires days rather than hours
- Adhesive consistency changes (thicker, harder to apply)
Cold weather bonding strategies:
Material conditioning:
- Store adhesives at room temperature (15-20°C) before use
- Transport in insulated containers
- Never apply adhesive that has been frozen
Substrate warming:
- Use temporary heating to bring substrates above minimum temperature
- Remove ice, frost, or condensation completely before bonding
- Verify temperature at time of application, not ambient air temperature
Extended support periods:
- Double or triple normal temporary bracing periods
- Don’t remove supports until adequate cure verification
- Test representative samples rather than assuming cure completion
Seasonal planning:
- Concentrate exterior bonding during moderate seasons
- Plan interior work for winter months
- Stock low-temperature formulations for off-season repairs
المشاكل الشائعة وحلولها
Recognizing and preventing typical adhesive failures saves time, money, and professional reputation.
Problem: Insufficient Initial Grab (Materials Slump or Fall)
أعراض: Bonded materials slide down walls, sag from position, or fall completely during initial cure period.
Common causes:
- Adhesive exceeding open time before bonding
- Insufficient adhesive coverage or incorrect pattern
- Surface contamination preventing adequate tack
- Temperature too cold or too hot for proper performance
- Material weight exceeding adhesive capacity
- Applying to dusty or moist surfaces
وقاية:
- Work within specified open time windows
- Apply adequate adhesive quantity per manufacturer specifications
- Verify surface cleanliness immediately before bonding
- Use high initial grab formulations for heavy materials
- Install temporary supports for heavy panels regardless of adhesive claims
- Match product selection to material weight and application
Remediation: Remove materials, clean both surfaces thoroughly, verify proper conditions, reapply fresh adhesive with appropriate temporary support.
Problem: Poor Final Bond Strength (Delamination After Cure)
أعراض: Materials bond initially but separate later, often with clean release indicating adhesive failure rather than cohesive failure.
Common causes:
- Inadequate surface preparation (most common)
- Incompatible substrate materials
- Surface contamination invisible but present
- Insufficient cure time before loading
- Environmental conditions outside specifications during cure
- Wrong product selection for application
وقاية:
- Implement and follow rigorous surface preparation procedures
- Test adhesion on actual project materials before full installation
- Use manufacturers’ recommended surface preparations and primers
- Allow complete cure before subjecting bonds to stress
- Monitor and document temperature and humidity during cure
- Select adhesives specifically formulated for substrate combination
Remediation: Complete removal required. Investigate cause through material examination—clean substrate failure indicates contamination; visible adhesive residue on both surfaces suggests cohesive failure from improper cure. Address underlying cause before reapplication.
Problem: Excessive Adhesive Squeeze-Out and Mess
أعراض: Adhesive oozes from joints, creates visible squeeze-out on finished surfaces, transfers to hands and tools, creates difficult cleanup situations.
Common causes:
- Over-application of adhesive
- Incorrect bead pattern for gap dimensions
- Excessive pressing force during bonding
- Materials not fitting properly, requiring excessive adhesive
- Working too slowly relative to open time
وقاية:
- Calculate required adhesive quantity and apply appropriate amount
- Match bead size and pattern to actual gap dimensions
- Fit materials properly before bonding (dry-fit verification)
- Apply consistent pressure during bonding without excessive force
- Work efficiently within open time windows
Cleanup:
- Remove excess immediately with appropriate solvent while uncured
- Cured adhesive requires mechanical removal (cut, scrape, sand)
- Protect finished surfaces with masking during installation
Problem: Adhesive Not Curing Properly
أعراض: Adhesive remains soft, tacky, or uncured well beyond specified cure time. Material may appear cured on surface but remains liquid internally.
Common causes:
- Extremely low humidity preventing moisture cure
- Very cold temperatures dramatically slowing reaction
- Excessive joint thickness exceeding cure capability
- Expired or degraded adhesive
- Contamination interfering with cure chemistry
الحلول:
- Increase humidity around installation if possible (light misting may help)
- Provide supplemental heat to accelerate cure in cold conditions
- Respect maximum gap-filling specifications
- Verify product date and storage conditions
- Test adhesive on sample before committing to large installation
Professional Selection Guide
Choosing the optimal adhesive for specific applications requires matching product capabilities to project requirements.
Adhesive Selection Decision Tree
Step 1: Define primary function
- Pure bonding (no gap-filling or flexibility needed): High-strength MS polymer or epoxy
- Bonding with flexibility: Standard MS polymer adhesive
- Bonding with gap-filling: Polyurethane adhesive
- Bonding with sealing: Hybrid adhesive-sealant
Step 2: Assess load requirements
- Decorative/lightweight (<2 kg/m²): Most adhesives adequate
- Medium loads (2-15 kg/m²): Standard construction adhesive
- Heavy loads (15-50 kg/m²): High-strength adhesive with initial grab
- Structural loads: Engineered adhesive systems only
Step 3: Consider environmental exposure
- Interior controlled environment: Most products suitable
- Interior humid areas: Moisture-resistant formulations
- Exterior weather exposure: UV-stable, weatherproof products
- Extreme temperatures: Verify service temperature range
- Chemical exposure: Select chemically resistant formulations
Step 4: Evaluate substrate compatibility
- Standard materials (metal, stone, wood): Most adhesives suitable
- Glass, mirrors: MS polymer (not polyurethane)
- Sensitive substrates: Verify compatibility, perform testing
- Dissimilar materials: MS polymer flexibility handles different expansion rates
Step 5: Review installation requirements
- Need immediate grab: High-initial-tack formulations
- Complex positioning: Extended open/working time products
- Large gaps: Polyurethane or thick-bed adhesives
- Fast project timeline: Quick-cure formulations
- Temporary supports available: Standard cure products acceptable
Product Recommendations by Application
Heavy stone panel installation: BoPin MS-850 High-Strength Construction Adhesive – Immediate grab eliminates supports, 3.0 MPa final strength handles heavy loads, zero shrinkage prevents stress.
Mirror mounting: BoPin MS-850 – Safe for mirror backing, no shrinkage prevents stress cracks, excellent humidity resistance.
Countertop installation: BoPin MS-850 – High strength for support, zero shrinkage maintains flatness, safe for all stone types.
General panel bonding: BoPin MS-850 or equivalent high-strength MS polymer – Versatile performance across applications, excellent material compatibility.
Wood construction: Quality polyurethane construction adhesive – Superior wood adhesion, gap-filling capability, moisture-resistant cure.
الأسئلة المتداولة
Can I use silicone sealant instead of construction adhesive?
No, for most bonding applications silicone sealant is inadequate. Silicone sealants are designed primarily for sealing with tensile strength typically 20-60 PSI. Construction adhesives provide 300-500+ PSI specifically for load-bearing applications.
When silicone works: Very light decorative items, temporary bonds, flexible gasket-type applications.
When adhesive is required: Any structural bonding, heavy materials, permanent installations, load-bearing applications.
Using sealant as adhesive is a common mistake that leads to failures. The products look similar and cure similarly, but performance differs dramatically. Always use products designed for your specific application.
How long does construction adhesive take to cure?
Cure timeline varies by formulation and conditions:
Initial tack: 10-15 minutes (materials held in position) Working strength: 24 hours (50-70% of final strength) الشفاء التام: 72 hours (complete strength development)
Factors affecting cure time:
- درجة حرارة: Cold dramatically slows cure; heat accelerates it
- رطوبة: Higher humidity speeds moisture-cure adhesives
- Joint thickness: Thick applications cure slower than thin
- Ventilation: Air circulation aids cure in confined applications
Best practice: Plan installation schedules assuming 72-hour cure before full loading, regardless of initial strength development that may seem adequate earlier.
What’s the difference between construction adhesive and wood glue?
Construction adhesives:
- Formulated for bonding diverse building materials
- Moisture-cure or reactive chemistry
- High flexibility accommodates material movement
- قدرة ممتازة على ملء الفراغات
- Suitable for interior and exterior
- Long open time for large assemblies
Wood glues (PVA, aliphatic resin):
- Optimized specifically for wood-to-wood bonding
- Water-based, dries through evaporation
- Creates extremely strong wood bonds but limited flexibility
- Minimal gap-filling (requires tight joints)
- Most types for interior only
- Faster initial tack but requires clamping
When to use which:
- Wood furniture and joinery: Wood glue
- Construction framing and general carpentry: Construction adhesive
- Combination applications: Construction adhesive or polyurethane
Can construction adhesive be used on wet surfaces?
Most construction adhesives require dry surfaces. Moisture at the bond interface prevents proper adhesion development and can cause complete bond failure.
Exceptions:
- Polyurethane adhesives tolerate and even benefit from slight moisture
- Some specialized formulations designed for damp substrate bonding
- “Wet surface” products explicitly state this capability
Verification required: Read manufacturer specifications. Unless product explicitly states wet-surface capability, assume dry surfaces are required. When uncertain, allow additional drying time rather than risk adhesion failure.
How do I remove cured construction adhesive?
Mechanical removal is typically the only effective method.
Removal techniques:
- Cutting: Sharp utility knife or oscillating tool cuts through adhesive
- Scraping: Putty knife or scraper removes bulk material
- Sanding: Power sander removes final residue from hard surfaces
- Heat: Heat gun softens some adhesives for easier scraping
- Chemical softeners: Limited effectiveness on cured MS polymer or polyurethane
Surface protection: Aggressive removal damages substrates. Work carefully to minimize substrate damage, especially on finished surfaces. Often easier to cover rather than completely remove adhesive residue.
Prevention better than cure: Careful application with masking and immediate cleanup of squeeze-out prevents most removal situations. Spend extra time protecting surfaces during installation rather than removing adhesive afterward.
Conclusion: Achieving Professional Bonding Results
Construction adhesives represent sophisticated technology that has fundamentally changed how buildings are assembled and finished. The combination of high strength, material versatility, and application convenience delivers results impossible with traditional mechanical fastening alone.
Keys to consistent success:
Understand the technology: MS polymer adhesives combine the best characteristics of multiple adhesive families while eliminating many traditional limitations. This versatility makes them ideal for diverse construction applications.
Match products to applications: Using sealants as adhesives or general adhesives for structural applications creates failures. Understanding capabilities and limitations ensures appropriate product selection.
Master surface preparation: No adhesive compensates for contaminated surfaces. Invest time in proper cleaning, surface preparation, and verification before bonding. This determines 70-80% of long-term success.
Respect open and cure times: Working within specified time windows and allowing adequate cure before loading ensures adhesives develop full strength and performance.
Consider environmental conditions: Temperature, humidity, and exposure conditions affect both application and long-term performance. Select products rated for actual conditions and adjust installation techniques accordingly.
Test when uncertain: Adhesion testing on actual project materials before full installation identifies problems when they’re easy and inexpensive to solve rather than after catastrophic failures.
The professional standard: Understanding modern adhesive technology and mastering proper installation techniques separates contractors delivering permanent, reliable results from those facing callbacks and failures. This knowledge enables you to specify and apply construction adhesives confidently for optimal performance across diverse applications.
Whether you’re installing heavy stone panels, mounting mirrors, bonding structural elements, or securing countertops, proper adhesive selection and professional application create permanent, reliable bonds that meet the complex demands of modern construction.
For technical support in selecting optimal construction adhesives and developing project-specific installation procedures, BoPin Construction Chemicals provides direct access to experienced specialists who understand both the products and the unique challenges of your applications and regional conditions.
مقالات ذات صلة:
- MS Polymer Sealants vs Silicone: Complete Comparison
- Building Facade Sealing: Professional Guide
- Can You Use Silicone Sealant as Adhesive?
- RTV Silicone Sealants: Complete Professional Guide
- Window & Door Installation: Foam Application Guide
Product References: