Applying silicone sealant properly is like riding a bike – once you learn the right technique, it becomes second nature. The difference between a professional-looking job that lasts for decades and a messy disaster that fails in months often comes down to following the right steps in the right order.
Here’s the truth: most silicone sealant failures aren’t caused by bad products – they’re caused by poor application technique. The good news? Learning proper application is straightforward when you understand the key principles. Whether you’re sealing a bathroom, fixing windows, or working on a construction project, these techniques work for any silicone application.
Before You Start: What You Need to Know
Success with silicone sealant starts before you even open the tube. Understanding what you’re working with and planning your approach prevents the most common problems and ensures professional results.
Choosing the Right Silicone for Your Job
Not all silicone sealants are the same, and using the wrong type is like using winter tires in summer – it might work, but you won’t get optimal performance. Neutral-cure silicones like BoPin’s general-purpose products work well for most applications because they don’t damage materials or create strong odors during curing.
For bathrooms and kitchens, choose anti-mold formulations that resist fungal growth in wet environments. Sanitary-grade silicones include special additives that prevent the black mold that ruins both appearance and performance.
Exterior applications need weather-resistant formulations that can handle UV exposure, temperature extremes, and constant moisture. Facade-grade silicones are specially engineered for these demanding outdoor conditions.
Gathering Your Tools and Materials
Having the right tools makes the application much easier and produces better results. Think of it like cooking – you can make a meal with basic tools, but having the right equipment makes everything smoother and more enjoyable.
Essential tools for any silicone job:
- Quality sealant gun – provides steady, controlled pressure for smooth application
- Sharp utility knife – for cutting clean, precise nozzle openings
- Smoothing tools – plastic spatulas or specially designed sealant tools work best
- Masking tape – creates clean, straight lines and protects adjacent surfaces
- Cleaning materials – isopropyl alcohol, clean rags, and appropriate cleaners
- Primer if needed – for porous or difficult surfaces
Safety equipment is also important:
- Disposable gloves – protect your hands and prevent contamination
- Safety glasses – prevent accidental splashes in your eyes
- Adequate ventilation – especially important in enclosed spaces
Understanding Working Time and Conditions
Silicone has a limited working time before it starts to skin over and become difficult to tool properly. Most products give you 5-15 minutes, depending on temperature and humidity conditions. Plan your work to complete tooling within this window.
Weather and environmental conditions significantly affect application and curing. Ideal conditions are 18-24°C (65-75°F) with 40-60% humidity. Avoid application in extreme heat, cold, high humidity, or windy conditions that can interfere with proper curing and tooling.
Temperature affects working time – hot conditions speed up skinning while cold conditions slow it down. Plan accordingly and work in smaller sections in challenging conditions to maintain control over the process.
Step 1: Surface Preparation – The Foundation of Success
Surface preparation is where most successful applications are won or lost. Like painting, 80% of the final result depends on proper preparation. Shortcuts here almost always lead to premature failure.
Removing Old Sealant Completely
If there’s old sealant in place, it must be completely removed. Silicone doesn’t bond well to old silicone, and even small bits left behind create weak points where failure starts. Think of it like trying to stick tape over old tape – it might hold temporarily, but will fail when stressed.
Use a sharp knife to cut along both edges of the old sealant, then carefully peel it away from the substrate. Work slowly to avoid damaging the surfaces underneath. For stubborn sealant, commercial sealant removers can soften the material for easier removal.
After mechanical removal, clean away all residue with appropriate solvents. Any remaining traces of old sealant will prevent proper adhesion of the new material.
Cleaning and Degreasing Surfaces
All surfaces must be completely clean and dry before applying new sealant. Oil, soap residue, dust, and other contaminants create barriers that prevent proper adhesion and lead to early failure.
For non-porous surfaces like glass and metal, clean with isopropyl alcohol (70% or higher) using lint-free cloths. This removes fingerprints, oils, and manufacturing residues that are often invisible but prevent good adhesion.
For porous surfaces like concrete and brick, mechanical cleaning may be needed to remove deep contamination. Wire brushes, sandpaper, or pressure washing can remove surface contaminants and create a clean substrate for sealing.
Allow surfaces to dry completely before proceeding with sealant application. Trapped moisture can interfere with adhesion and cause long-term performance problems.
Applying Primer When Needed
Porous materials like concrete, brick, and some woods benefit from primer to improve adhesion and prevent sealant absorption into the substrate. Universal primers work with most silicone types and significantly improve performance on challenging surfaces.
Apply primer with a brush or cloth in a thin, even layer according to the manufacturer’s instructions. Allow proper drying time before applying sealant – usually 10-30 minutes, depending on conditions.
Don’t over-apply primer, as excess material can interfere with sealant adhesion. A thin, uniform layer that penetrates the surface provides optimal results.
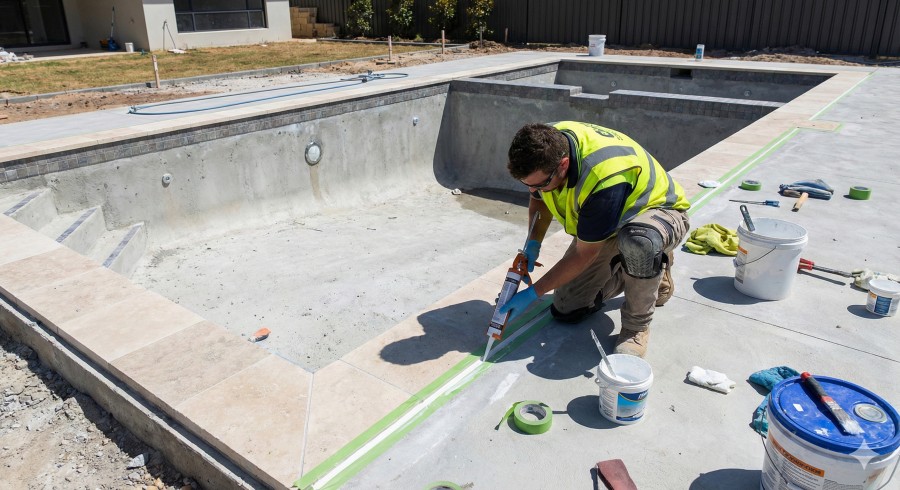
Step 2: Joint Design and Masking
Proper joint design ensures your sealant can perform its job without being overstressed. Poor joint design causes even the best sealants to fail prematurely.
Creating the Right Joint Dimensions
The ideal joint is twice as wide as it is deep – this 2:1 ratio distributes stress optimally and allows the sealant to flex without tearing. A 12mm wide joint should be about 6mm deep for best performance.
Joints that are too narrow concentrate stress and often fail cohesively (tear apart in the middle). Joints that are too deep prevent proper curing and can trap uncured material that remains weak permanently.
Use a backing rod or bond breaker material to control joint depth and prevent three-sided adhesion. Closed-cell polyethylene foam backing rod is the most common choice and works well for most applications.
Proper Masking Technique
Masking tape creates clean, professional-looking sealant lines and protects adjacent surfaces from contamination. Apply tape carefully with clean hands to avoid transferring oils that could interfere with adhesion.
Leave the proper gap width between tape edges – this becomes your joint width. Measure carefully and use a consistent gap throughout the installation for a professional appearance.
Press tape edges down firmly to prevent sealant from bleeding underneath. But don’t stretch the tape as this can cause it to lift or leave residue when removed.
Plan to remove the tape immediately after tooling while the sealant is still workable. Waiting too long makes removal difficult and can damage the sealant bead.
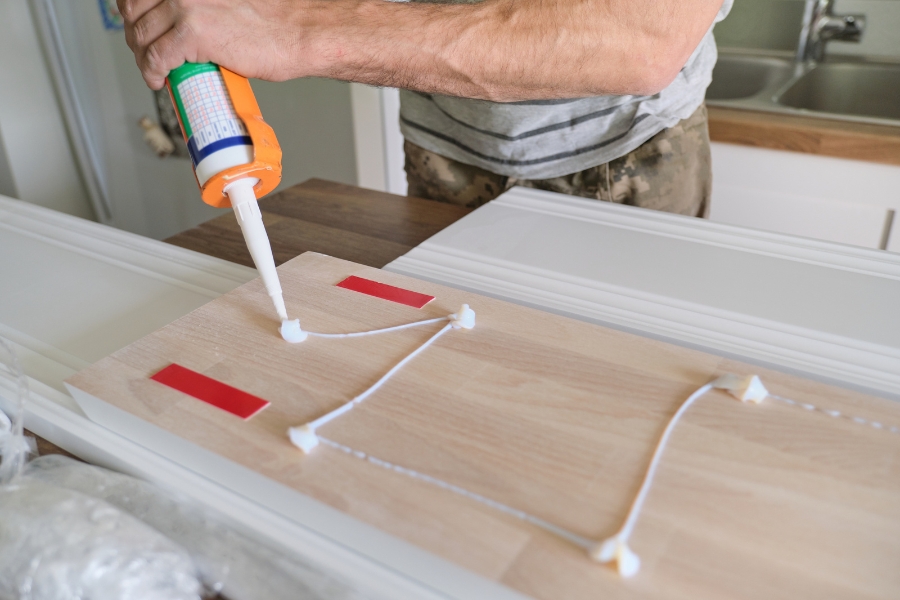
Step 3: Loading and Cutting the Sealant Cartridge
Proper cartridge preparation ensures smooth, consistent application without air bubbles or flow problems that can ruin your work.
Loading the Cartridge in Your Gun
Remove the cartridge tip and cut the seal at the base of the threaded area. Some cartridges have a foil seal that must be punctured with a nail or awl before the tip can be attached.
Load the cartridge into your sealant gun with the plunger fully retracted. Make sure the cartridge seats properly in the gun cradle and the plunger aligns with the cartridge base.
Test the gun mechanism before attaching the tip to ensure smooth, consistent pressure. A gun that doesn’t work smoothly will make application difficult and produce poor results.
Cutting the Nozzle Properly
Memeyi 45 derecelik bir açıyla kesin to create an oval opening that produces a nice bead shape. The size of the cut determines the bead width – start smaller than you think you need because you can always enlarge the opening.
Make a clean, straight cut with a sharp knife. Rough or angled cuts create uneven beads that are difficult to tool properly and look unprofessional.
For very small beads, cut near the tip of the nozzle. For larger beads, cut further back where the nozzle is wider. Most residential applications need a 6-12mm bead width.
Testing Flow and Consistency
Before starting your actual work, test the flow on a piece of cardboard or scrap material. This lets you adjust pressure and technique without risking your final application.
Check for consistent flow and smooth operation of the gun trigger. Jerky or inconsistent flow indicates problems with the gun or cartridge that should be fixed before proceeding.
Adjust your hand position and gun angle until you achieve smooth, controlled application. Practice maintaining a steady speed as this directly affects bead appearance and quality.
Step 4: Applying the Sealant Bead
Doğru uygulama tekniği güçlü, çekici contalar oluşturur that perform well for decades. The key is maintaining consistent speed, pressure, and angle throughout the application.
Positioning and Movement Technique
Hold the gun at a 45-degree angle to the joint direction for most applications. This angle helps push the sealant into the joint while creating a smooth surface profile.
Maintain steady forward movement at a consistent speed – about the pace you’d use to write your name with a pen. Too fast creates thin spots and voids, while too slow creates excessive buildup that’s difficult to tool properly.
Keep consistent pressure on the trigger to maintain uniform bead size. Most people apply too much pressure initially – start light and increase as needed rather than starting too aggressive.
Filling the Joint Properly
Apply sealant in one continuous motion whenever possible. Stopping and starting create weak points where the joint is most likely to fail later.
Fill the joint slightly more than needed – it’s easier to remove excess during tooling than to add more later. The goal is complete filling without voids or air bubbles that could allow water penetration.
For long joints, work in manageable sections that you can tool within the working time. Plan section breaks at natural stopping points like corners or intersections rather than in the middle of straight runs.
Maintaining Consistent Bead Quality
Watch the bead as you apply it to catch problems immediately. Inconsistent bead size, air bubbles, or gaps should be corrected right away while the material is still workable.
If you make a mistake, stop immediately and fix it before proceeding. Trying to correct mistakes usually makes things worse and creates more work later.
Keep the nozzle clean by wiping it periodically with a damp cloth. Dried sealant on the nozzle can cause flow problems and affect bead quality.
Step 5: Tooling for Professional Results
Tooling is what transforms a rough sealant bead into a smooth, professional-looking seal. This step significantly affects both the appearance and performance of the finished installation.
Timing Your Tooling
Begin tooling immediately after application while the sealant is still completely workable. Most products give you 5-15 minutes before skinning begins and tooling becomes difficult.
Work systematically to complete all tooling within the working time. For large projects, consider working with a helper – one person applies while the other tools behind them.
Don’t let sealant sit too long before tooling, as partially cured material doesn’t tool well and may leave rough surfaces or tool marks.
Tooling Technique and Pressure
Use light, consistent pressure when tooling – the goal is to shape and smooth, not to remove material. Too much pressure pushes sealant out of the joint and creates thin spots that perform poorly.
Maintain a consistent angle and speed when tooling for uniform appearance. Work from one end to the other in smooth, continuous motions rather than stopping and starting.
Keep your tooling implement clean by wiping it frequently with a damp cloth. Dried sealant on tools creates drag and a poor surface finish.
Different Tooling Methods
Finger tooling works well for small jobs and gives good control, but use gloves or barrier cream to protect your skin. Wet your finger slightly with soapy water to prevent sticking.
Plastic tools work well for most applications and don’t scratch surfaces. Various profiles are available to create different bead shapes – concave tools create the most common profile.
Professional tooling solutions can be used instead of soapy water for better results. These specialized products improve surface finish and don’t interfere with curing like some soaps can.
Step 6: Removing Masking Tape and Final Cleanup
The final steps determine whether your work looks professional or amateur. Careful tape removal and cleanup make the difference between a job you’re proud of and one you want to hide.
Proper Tape Removal Timing
Takımlamadan hemen sonra maskeleme bandını çıkarın while the sealant is still soft and workable. Waiting too long makes removal difficult and often damages the sealant bead.
Pull tape away at a 45-degree angle rather than straight up to minimize the chance of disturbing the fresh sealant. Pull steadily and smoothly rather than jerking or stopping.
If the sealant tries to follow the tape, cut it carefully with a sharp knife rather than letting it stretch and distort. A clean cut heals better than a stretched and torn surface.
Cleaning Up Excess Sealant
Remove any excess sealant immediately while it’s still uncured and easy to clean. Use appropriate solvents – isopropyl alcohol works well for most silicone types.
Don’t try to clean cured sealant with solvents, as this rarely works well and can damage surfaces. Mechanical removal is usually needed for hardened material.
Clean your tools immediately after use to prevent buildup that makes them difficult to use later. Many sealant removers work well for tool cleaning if done promptly.
Final Inspection and Touch-Up
Inspect your work under good lighting to identify any problems that need immediate attention. Small gaps, voids, or imperfections can often be fixed while the material is still workable.
For minor touch-ups, use a small amount of fresh sealant and tool it to blend with the surrounding area. Major problems usually require the removal and reapplication of entire sections.
Document your work with photos for future reference and warranty purposes. Good records help with maintenance planning and can be valuable for insurance claims if problems develop.
Curing and Performance Considerations
Understanding how silicone cures helps you plan your work and avoid problems that can affect long-term performance.
Curing Time and Conditions
Silicone cures from the outside in as moisture from the air reacts with the material. Thick sections cure more slowly than thin ones, and deep joints may take several days to cure completely.
Temperature and humidity affect curing speed. Warm, humid conditions speed curing, while cold, dry conditions slow it down. Plan accordingly when scheduling follow-up work or exposure to stress.
Avoid disturbing the sealant during initial curing as this can create surface defects or weak spots. Most products develop handling strength within 24 hours, but full cure may take several days.
What to Expect During Curing
Slight shrinkage is normal as solvents evaporate and the material cures. Excessive shrinkage indicates poor joint design or application problems that should be corrected.
Color changes during curing are usually normal – many products appear darker when wet and lighten as they cure. Unusual color changes or surface deposits may indicate contamination or compatibility problems.
Odor during curing is normal for most silicone types, though neutral-cure products have much less odor than acetoxy types. Yeterli havalandırma sağlayın until curing is complete.
Common Mistakes and How to Avoid Them
Learning from common mistakes helps you avoid problems that can ruin your work and waste time and materials.
Surface Preparation Shortcuts
Skipping proper cleaning is the most common mistake that leads to adhesion failure. Taking time for thorough surface preparation is always worth the effort in terms of long-term performance.
Not removing all old sealant creates weak points where new sealant can’t bond properly. Complete removal is essential, even though it takes more time and effort.
Applying sealant to wet surfaces prevents proper adhesion and can cause long-term problems. Allow adequate drying time after cleaning before proceeding with application.
Application Technique Problems
Moving too fast or too slow during application creates uneven beads that are difficult to tool properly. Practice on scrap material to develop a consistent technique before starting your final work.
Using too much or too little sealant causes problems with tooling and performance. Aim for a slight overfill that allows proper tooling without waste.
Poor timing of tooling – either too early or too late – affects both appearance and performance. Plan your work to allow proper tooling within the working time.
Environmental and Planning Issues
Working in poor conditions compromises both application and curing. Wait for appropriate weather rather than forcing work in challenging conditions.
Not having all the materials and tools ready leads to rushed work and poor results. Complete preparation before starting ensures smooth, professional execution.
Inadequate planning for large projects can result in rushed work or material waste. Break large jobs into manageable sections and plan timing carefully.
Sıkça Sorulan Sorular
How long should I wait before using a freshly sealed area?
Wait at least 24 hours before light use and 48-72 hours before full exposure to water or stress. While silicone develops handling strength quickly, full cure takes several days, depending on thickness and conditions. For critical applications like showers, wait a full week before heavy water exposure to ensure complete curing.
Can I apply silicone sealant over existing caulk?
No, old caulk should be completely removed before applying new silicone. Silicone doesn’t bond well to most other materials, including old silicone, and layering creates weak points that lead to early failure. Take time for complete removal, even though it requires more work – the results are worth it.
What should I do if my sealant bead looks rough or uneven?
If the sealant is still soft, re-tool it immediately using proper technique and clean tools. For partially cured sealant, you may need to remove the rough section and reapply fresh material. Once fully cured, mechanical removal is usually needed to correct appearance problems.
How can I get perfectly straight sealant lines?
Use high-quality masking tape and remove it immediately after tooling. Press tape edges down firmly and maintain a consistent gap width. Professional results also depend on steady gun movement and consistent application speed. Practice on scrap material helps develop the muscle memory for straight, even application.
What’s the best way to clean up silicone sealant mistakes?
Clean uncured sealant immediately with isopropyl alcohol and clean cloths. For cured sealant, mechanical removal with sharp blades is usually most effective. Commercial sealant removers can help soften cured material for easier removal, but always test on inconspicuous areas first.
Çözüm
Applying silicone sealant properly is a skill that improves with practice, but following these fundamental steps ensures success from your first attempt. The key principles – thorough surface preparation, proper joint design, consistent application technique, and timely tooling – apply to every silicone sealing job regardless of size or complexity.
Taking time to do each step correctly pays dividends in both appearance and performance. Professional-looking installations that last for decades result from attention to detail rather than expensive tools or secret techniques. The materials and methods described here work for everything from simple bathroom maintenance to complex construction projects.
Remember that silicone application is forgiving if you catch mistakes early, but very difficult to fix once cured. Work systematically, maintain quality control throughout the process, and don’t hesitate to remove and redo sections that don’t meet your standards.
Environmental conditions, material selection, and proper preparation significantly affect results. Understanding these factors helps you plan work for optimal conditions and choose appropriate products for your specific application and climate.
BoPin Construction Chemicals provides comprehensive technical support for proper application techniques and can help troubleshoot specific challenges you might encounter. Quality products combined with proper application technique ensure reliable, long-lasting sealing performance that protects your investment for decades.
Need specific guidance for your silicone sealing project? Contact BoPin’s technical team for expert advice on product selection and application techniques tailored to your specific requirements and conditions.