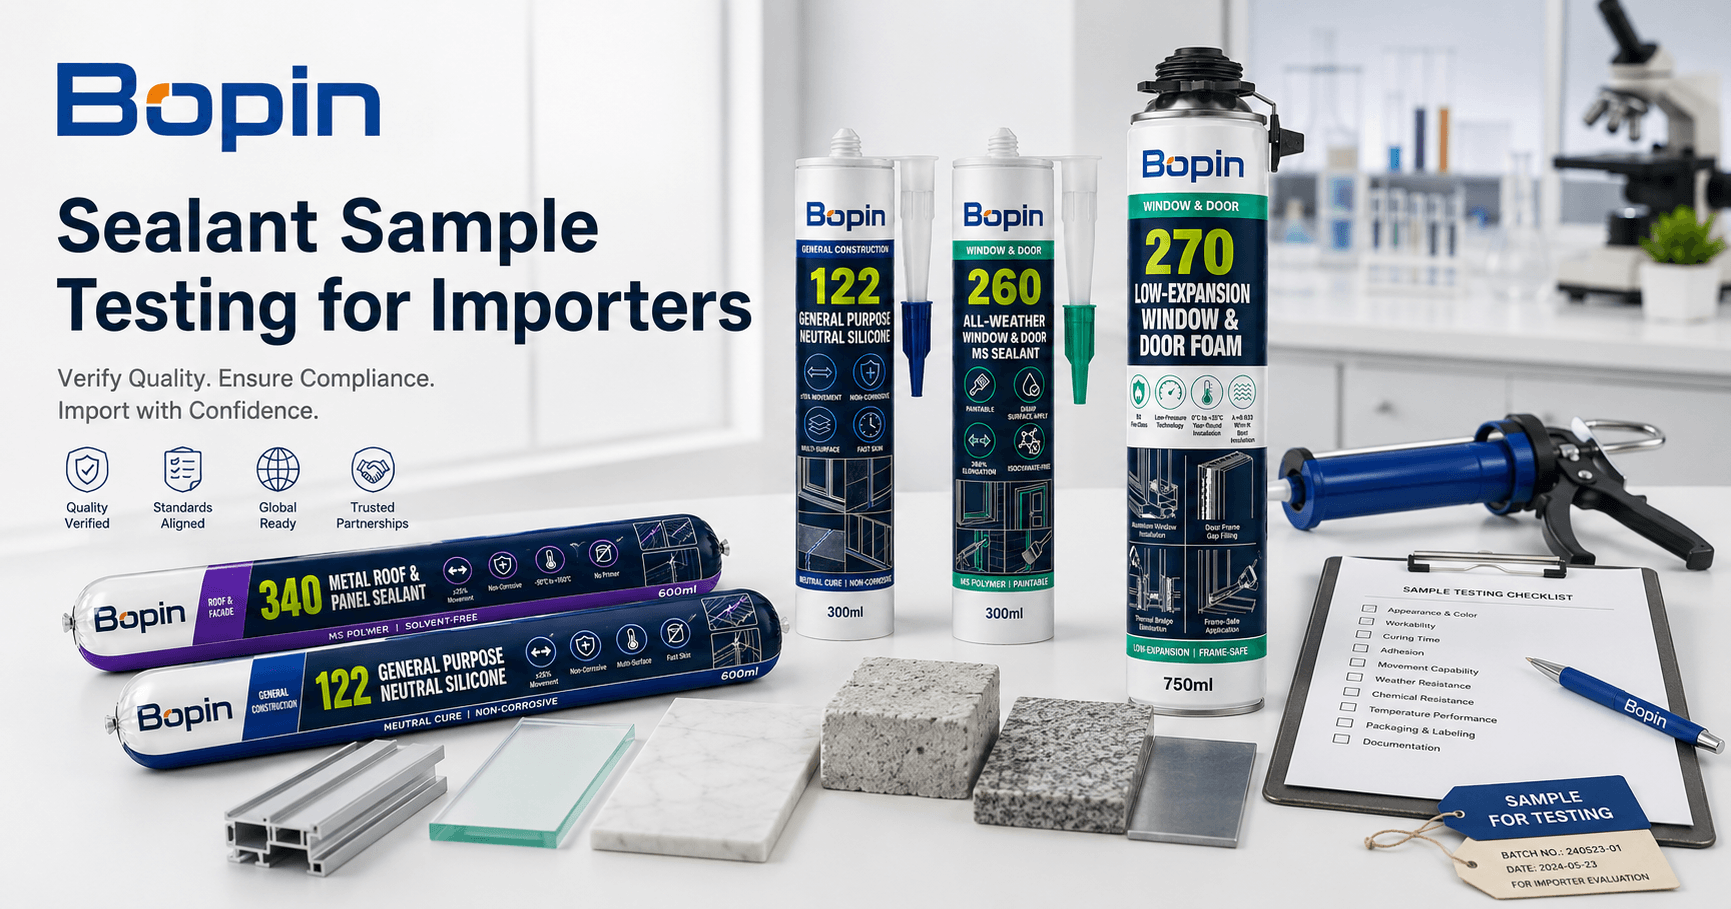
Expert guidance from BoPin Construction Chemicals – choosing shower caulk that lasts
Why Your Shower Caulk Choice Matters More Than You Think
You’ve just finished a beautiful bathroom renovation. New tile gleams. The shower enclosure sparkles. Everything looks perfect.
But six months later, you notice black spots along the tub edge. The caulk line is discolored. Water seems to be getting behind the seal. What should have been a decade-long installation is already failing.
This scenario plays out in bathrooms worldwide because the wrong caulk was used. Not all caulk is suitable for shower environments. The constant water exposure, humidity, temperature changes, and cleaning chemicals create one of the most demanding sealing applications in any home.
This comprehensive guide will show you exactly how to choose shower caulk that performs reliably for years. You’ll learn why 100% silicone dominates bathroom applications, what makes premium products worth the investment, and how to identify truly mold-resistant formulations.
Le résultat ? The confidence to select and install shower caulk that keeps water where it belongs while maintaining a clean, professional appearance for decades.
1. Why Showers Demand Special Caulk
Shower environments create unique challenges that destroy ordinary sealants within months.
Constant Water Exposure
Showers face more water than any other sealed area in a typical home.
Daily water contact:
- Direct spray during every shower
- Standing water in horizontal joints
- Water pooling against vertical surfaces
- Steam and humidity between showers
- Condensation during temperature changes
Most caulk types can’t handle this: Standard acrylic caulk is only “water-resistant,” not waterproof. It gradually breaks down under constant moisture. Within 6-18 months, it loses adhesion and allows water penetration.
Only truly waterproof products survive constant shower exposure. This immediately eliminates most caulk options and narrows the field to silicone and a few specialty products.
Mold and Mildew Growth
Shower conditions create the perfect environment for biological growth.
What mold needs:
- Moisture (abundant in showers)
- Warmth (typical bathroom temperatures)
- Organic material (soap residue, skin cells)
- Time undisturbed (between cleanings)
Standard caulk becomes a mold magnet: Without anti-microbial additives, ordinary caulk provides an ideal surface for mold colonization. The black spots you see aren’t just surface staining—they’re active mold growth that can spread behind tiles and into walls.
Premium shower caulk includes biocides: These additives prevent mold from establishing on the caulk surface. Products certified to the highest sanitary standards provide the best protection.
Temperature Cycling
Showers experience dramatic temperature changes that stress sealed joints.
Temperature stress cycle:
- Cold surfaces before shower: 18-22°C
- Hot water contact during shower: 40-60°C surface temperature
- Cool-down after shower: Back to ambient
- This cycle repeats daily—10,000+ times over a decade
Rigid caulk cracks under this stress: Products without sufficient flexibility develop stress cracks that grow with each temperature cycle.
Flexible silicone accommodates movement: Quality silicone maintains elasticity through unlimited temperature cycles, preventing crack formation.
Exposition chimique
Bathroom cleaning products are surprisingly aggressive toward many sealant materials.
Chemical challenges:
- Chlorine bleach (common in bathroom cleaners)
- Acidic cleaners (lime and soap scum removers)
- Alkaline cleaners (heavy-duty degreasers)
- Hydrogen peroxide
- Ammonia-based products
Many caulks degrade chemically: Acrylic and latex-based products can be attacked by these chemicals, causing discoloration, softening, or adhesion loss.
Silicone resists chemical attack: Its inorganic structure remains stable when exposed to typical bathroom cleaning chemicals.
2. Silicone vs. Other Shower Caulk Types
Understanding why silicone dominates bathroom applications helps you make informed choices.
Comprehensive Comparison for Shower Use
| Property | 100% Silicone | Acrylic Latex | Polyuréthane | Hybrid (Siliconized Acrylic) |
|---|---|---|---|---|
| Étanchéité | Excellent (truly waterproof) | Poor (water-resistant only) | Bien | Fair to Good |
| Mold Resistance | Excellent (with additives) | Poor to Fair | Fair | Bien |
| Flexibilité | Excellent (±25-50%) | Poor (±7-12%) | Good (±25%) | Fair (±15%) |
| Durability | 20-30+ years | 2-5 years | 5-10 years | 5-10 years |
| Résistance chimique | Excellent | Poor | Bien | Fair |
| Ease of Application | Bien | Excellent | Bien | Bien |
| Possibilité de peinture | No | Yes | Yes | Yes |
| Coût | $$-$$$ | $ | $$ | $$ |
| Idéal pour | Showers, tubs, wet areas | Dry areas only | Specialty uses | Light moisture areas |
Why 100% Silicone Wins for Showers
Silicone’s dominance in bathroom applications isn’t marketing—it’s chemistry.
Hydrophobic by nature: Silicone’s molecular structure repels water. Water beads up on its surface rather than being absorbed. This fundamental property makes it ideal for constant water exposure.
Permanent flexibility: Unlike organic polymers that can harden or become brittle over time, silicone maintains its elastic properties indefinitely. It stretches and compresses with joint movement without tearing or losing adhesion.
UV and heat stable: Bathrooms with windows expose caulk to UV radiation. Silicone’s inorganic silicon-oxygen backbone resists UV degradation that destroys organic materials.
Chemical inertness: Bathroom cleaners that would attack other materials don’t affect silicone’s performance or appearance.
Proven longevity: Properly installed silicone in shower applications routinely lasts 20-30+ years—often outlasting the fixtures themselves.
When Other Types Might Work (And When They Don’t)
Acrylic latex caulk:
- Acceptable for: Dry areas like trim work far from water
- Never use for: Any shower or tub application—guaranteed failure
- Why it fails: Not truly waterproof; mold grows readily; loses adhesion when wet
Polyurethane caulk:
- Acceptable for: Some specialty applications with professional guidance
- Limites: More expensive than silicone without performance advantages
- Not recommended: Unless specifically required for unusual circumstances
Hybrid/siliconized acrylic:
- Acceptable for: Light moisture areas like sink backsplashes
- Not for showers: Insufficient waterproofing for constant water exposure
- Marketing confusion: “Siliconized” doesn’t mean it performs like silicone
The professional consensus is clear: For shower and tub applications, specify 100% silicone. The alternatives cost less initially but fail prematurely, making them more expensive in the long run.
3. Essential Features: What Makes Premium Shower Caulk Worth It
Not all silicone caulk is created equal. Understanding quality markers helps you identify products that deliver superior performance.
Mold-Free Protection: Beyond Basic Formulations
“Mold resistant” and “mold-free” represent different performance levels.
Basic mold resistance:
- Contains some anti-microbial additives
- Reduces but doesn’t eliminate mold growth
- May require more frequent cleaning
- Performance diminishes over time
Premium mold-free protection:
- Advanced biocide package with multiple agents
- Prevents mold establishment on caulk surface
- Long-lasting protection (product lifetime)
- Certified to highest sanitary standards
Look for specific certifications:
Sanitary Class ratings: Products tested to standards like ISO 11600 or similar receive classifications. XS1 represents the highest sanitary class with the best mold resistance.
Silicone sanitaire BoPin 550 achieves XS1 highest sanitary class rating with advanced anti-mold technology specifically engineered for wet area applications.
Microban or similar technologies: Some premium products incorporate proprietary anti-microbial systems. Verify these claims with independent testing data.
Neutral Cure vs. Acetoxy Cure: Why It Matters
The curing system affects odor, compatibility, and user experience.
Acetoxy cure silicone:
- Characteristic: Strong vinegar odor during cure
- Chemistry: Releases acetic acid as it cures
- Avantages : Faster cure, slightly stronger initial adhesion
- Disadvantages: Odor can be unpleasant; may corrode some metals
- Verdict: Acceptable for bathrooms but not optimal
Neutral cure silicone:
- Characteristic: Minimal odor during cure
- Chemistry: Releases alcohol or other neutral compounds
- Avantages : No unpleasant odor; safe for all materials including metals
- Universal compatibility: Won’t damage any fixture materials
- Verdict: Preferred for bathroom applications
For occupied homes, neutral cure is worth the modest cost difference. The lack of vinegar odor makes the application and curing process much more pleasant, especially important in bathrooms where ventilation may be limited.
Stain Resistance: Keeping It Looking Clean
Some silicone formulations resist dirt and soap scum better than others.
Basic silicone:
- Attracts and holds onto soap residue
- Shows discoloration over time
- Requires aggressive cleaning
- May look dingy after a few years
Stain-resistant formulations:
- Modified surface chemistry repels dirt
- Cleans easily with mild soap and water
- Maintains appearance longer
- Worth the premium for visible applications
Color considerations:
Clear silicone:
- Visually recedes, making joints less noticeable
- Shows dirt and mildew more readily
- Best for tile-to-tile applications where you want the joint to disappear
White silicone:
- Classic choice for most bathroom applications
- Shows dirt less than clear but still requires regular cleaning
- Creates defined lines that look intentional
Matching colors:
- Almond, bone, biscuit for matching fixtures
- Gray or colored options for specific tile
- Custom colors available from some manufacturers for large projects
Fast Waterproofing: When Time Matters
Standard silicone requires 24-48 hours before water exposure. Premium products offer faster performance.
Rapid waterproofing formulations:
- Initial water resistance: 30 minutes to 2 hours
- Guérison complète : Still requires 24-48 hours
- Advantage: Shower can be used sooner (carefully)
- Application: Ideal for renovation projects where downtime must be minimized
Silicone sanitaire BoPin 550 creates an effective water barrier within 30 minutes while providing XS1 sanitary class protection, allowing faster project completion without sacrificing performance.
4. Our Top Recommendations: Best Shower Caulk for Different Needs
The best shower caulk depends on your specific requirements and budget.
Premium Choice: BoPin 550 Sanitary Neutral Silicone
BoPin 550 Sanitary Neutral Silicone represents the professional standard for shower and bath applications.
Why it’s our top recommendation:
XS1 Highest Sanitary Class: Independently certified to the most stringent mold resistance standards. Advanced anti-mold technology prevents fungal growth even in challenging conditions.
Rapid Waterproofing: Creates effective water barrier within 30 minutes, allowing faster return to service while maintaining long-term performance.
Superior Chemical Resistance: Withstands household cleaning products including chlorine bleach, acidic cleaners, and degreasers without degradation or discoloration.
Stone-Safe Formula: Can be safely used on natural stone surfaces including marble and granite without causing discoloration concerns—critical for luxury bathrooms.
MEKO-Free Composition: Environmentally safer formulation with low VOC content (<35 g/L) suitable for green building requirements and occupied spaces.
Long-Term Flexibility: Maintains performance despite temperature fluctuations and vibration, with >500% elongation capacity and ±25% movement capability.
Tropical Climate Optimization: Specially formulated for high humidity regions (particularly Southeast Asia) but performs excellently in all climates.
Couleurs disponibles : Clear, White, Grey, Manhattan (Jasmine), Black
Technical specifications:
- Base material: Neutral oxime silicone
- Temperature resistance: -40°C to +120°C
- Application temperature: +5°C to +40°C
- Skin formation: 10-20 minutes
- Full cure: 24 hours per 2-3mm thickness
- Shelf life: 18 months unopened
Ideal for:
- New shower installations
- Bathtub perimeter sealing
- Shower door frame sealing
- Wet room applications
- Luxury bathroom projects
- Commercial and residential applications
For Natural Stone Showers: BoPin 635 Natural Stone Silicone
Marble, granite, and natural stone showers require non-staining formulations.
BoPin 635 Natural Stone Silicone provides guaranteed non-staining performance specifically for porous natural materials.
Why specify this for stone showers:
ASTM C1248 Tested: Independently tested and certified to ensure no edge discoloration or migration into marble, granite, limestone, and travertine.
True Non-Staining Formula: Prevents the dark shadow or discoloration that standard silicones can cause on porous stone materials—critical for preserving stone appearance.
Superior Stone Adhesion: Exceptional bonding to all natural stones without requiring primers, even on polished or honed surfaces.
Advanced Mold Resistance: Premium anti-fungal protection maintains clean appearance in wet stone shower environments.
High Movement Capability: ±25% accommodation handles thermal expansion of stone materials and structural movement.
UV and Weather Stability: Maintains appearance and properties despite sun exposure in windowed bathrooms.
Couleurs disponibles : Clear, White, Grey, Black, Manhattan (warm beige), Travertine
Ideal for:
- Marble shower walls and floors
- Granite shower installations
- Limestone shower enclosures
- Travertine wet area applications
- High-end residential bathrooms
- Luxury spa environments
Budget-Conscious Option: What to Look For
If premium products exceed your budget, prioritize these essential features:
Must-have characteristics:
- silicone 100% (non-negotiable)
- Mold resistance (at minimum, basic anti-microbial additives)
- Bathroom/kitchen rating (specifically labeled for wet areas)
- Neutral cure preferred (better user experience)
Acceptable compromises:
- Longer cure time (48 hours vs. 30 minutes)
- Basic mold resistance vs. premium protection
- Fewer color options
- Standard warranty vs. extended coverage
Never compromise on:
- Silicone vs. acrylic (always choose silicone)
- Waterproofing capability
- Basic mold protection
5. Professional Application Guide: Getting It Right
Even the best caulk fails if applied incorrectly. Proper technique ensures optimal performance.
Complete Old Caulk Removal: The Critical First Step
Never caulk over old caulk in shower applications—this is the most common mistake.
Why removal is essential:
- Old caulk may harbor mold beneath the surface
- New caulk bonds to old caulk, not the substrate
- Old caulk may be failing, compromising the new seal
- Proper adhesion requires direct contact with clean surfaces
Removal process:
Step 1: Cut and peel
- Use utility knife to cut along both edges
- Score the old caulk thoroughly
- Peel away the bulk material in sections
Step 2: Remove residue
- Scrape remaining caulk with plastic scraper
- Use caulk remover solvent for stubborn residue
- Rubbing alcohol helps remove final traces
- Razor blade carefully used on glass and tile (never on acrylic)
Step 3: Clean thoroughly
- Wash area with appropriate cleaner
- Remove all soap scum, mildew, and residue
- Rinse completely
- Allow to dry thoroughly (critical for adhesion)
Step 4: Verify cleanliness
- Surface should be completely clean and dry
- No oily residue, soap film, or old caulk remnants
- Test adhesion on small area if uncertain
Surface Preparation: Beyond Just Cleaning
Proper preparation makes the difference between 5-year and 25-year service life.
Cleaning protocol:
Mold and mildew removal:
- Use bleach solution (1:10 bleach to water) or hydrogen peroxide
- Allow 10-15 minutes contact time
- Scrub thoroughly with brush
- Rinse completely
- Dry thoroughly before proceeding
Degreasing:
- Remove soap scum and body oils with TSP or degreaser
- These residues prevent adhesion
- Multiple cleaning passes may be necessary
- Final wipe with isopropyl alcohol
Drying:
- Allow 24 hours drying after cleaning in humid environments
- Use fans to accelerate drying
- Verify complete dryness before application
- Consider dehumidifier in very humid climates
Surface condition check:
- Repair any damaged tiles or grout
- Address underlying moisture problems
- Ensure substrates are sound and stable
- Fix leaks before sealing
Application Technique for Professional Results
Proper application creates durable, attractive seals.
Tools needed:
- Quality caulk gun (ratcheting type preferred)
- Couteau utilitaire tranchant
- ruban adhésif de masquage
- Caulk finishing tool or smoothing stick
- Isopropyl alcohol or soapy water
- Clean rags
- Rubber gloves
Application steps:
Step 1: Masking (highly recommended)
- Apply painter’s tape to both sides of joint
- Position tape 3-4mm from joint edge
- Creates clean, professional lines
- Prevents messy cleanup
Step 2: Prepare cartridge
- Couper la buse à un angle de 45 degrés
- Size opening to match joint width
- Pierce inner seal completely
- Load into caulk gun
Step 3: Apply bead
- Hold gun at 45-degree angle
- Apply steady, even pressure
- Move at consistent speed
- Fill joint completely but don’t overfill
- Work in 2-3 foot sections for tooling manageability
Step 4: Tool immediately
- Use finishing tool, wet finger, or spoon back
- Draw along joint in one smooth motion
- Light to moderate pressure
- Creates concave profile that sheds water
- Wipe tool clean between passes
Step 5: Remove tape
- Pull tape away immediately after tooling
- Remove while caulk is still wet
- Pull at 45-degree angle away from joint
- Slow, steady motion prevents tearing
Step 6: Final smoothing
- Make final pass if needed for perfection
- Wipe away any excess immediately
- Clean adjacent surfaces before caulk skins
Curing and Care: The Waiting Game
Patience during cure prevents premature failure.
Cure timeline:
- Formation de la peau : 10 à 30 minutes (surface non collante)
- Light water exposure: 2-4 hours minimum (brief contact okay)
- Normal use: 24 hours (light showering acceptable)
- Guérison complète : 48-72 hours (complete chemical cure)
- Maximum strength: 7-14 days (optimal properties developed)
During cure period:
- Keep area well-ventilated
- Avoid touching or disturbing the caulk
- Don’t use harsh cleaners
- Minimize water exposure (especially first 24 hours)
- No scrubbing or aggressive contact
After cure:
- Allow full cure before aggressive cleaning
- Use gentle cleaners initially
- Avoid abrasive scrubbing for first week
- Check for any areas needing touch-up
6. Common Shower Caulking Mistakes and How to Avoid Them
Learning from common errors saves time, money, and frustration.
Mistake #1: Using Acrylic Instead of Silicone
The most common and costly mistake in bathroom caulking.
Why people do it:
- coût inférieur
- Easier to find in stores
- Paintable (seems like an advantage)
- Easier to tool and clean up
Why it fails:
- Not truly waterproof
- Breaks down under constant moisture
- Mold grows readily
- Typical lifespan: 6-18 months in showers
The fix:
- Always specify 100% silicone for showers
- The modest cost difference (typically $3-5) is trivial compared to redo costs
- Accept that shower caulk won’t be paintable—you don’t paint shower seals anyway
Mistake #2: Caulking Over Old Caulk
Tempting shortcut that guarantees poor results.
Why people do it:
- Removal seems difficult and time-consuming
- Old caulk may look okay in some areas
- Hoping new caulk will fix problems
Why it fails:
- New caulk bonds to old caulk, not substrate
- Old caulk may harbor mold that spreads
- Failure of old caulk undermines new application
- Creates thick, unsightly build-up
The fix:
- Always remove old caulk completely
- Take time to do thorough removal and cleaning
- The extra 30-60 minutes ensures years of reliable performance
Mistake #3: Inadequate Surface Preparation
Clean and dry surfaces are non-negotiable.
Why people skip it:
- Seems unnecessary if surface looks clean
- Eager to apply caulk and finish project
- Underestimate importance
Why it causes failure:
- Soap scum prevents adhesion
- Mildew spores under caulk continue growing
- Moisture prevents proper cure
- Oil residue creates bond failure
The fix:
- Clean with appropriate cleaners
- Remove all mold and mildew
- Degrease thoroughly
- Allow complete drying (24 hours in humid conditions)
- Final wipe with isopropyl alcohol
Mistake #4: Not Allowing Proper Cure Time
Using shower before caulk fully cures compromises performance.
Why people do it:
- Only one bathroom in home
- Caulk appears dry
- Unaware of cure requirements
Why it causes problems:
- Incomplete cure reduces waterproofing
- Premature water exposure weakens adhesion
- Can wash away uncured material
- Prevents development of full properties
The fix:
- Plan project timing around cure requirements
- Wait minimum 24 hours before shower use
- Ideally allow 48 hours for complete cure
- Consider using other bathroom or timing around travel
Mistake #5: Wrong Joint Design
Joint geometry affects performance.
Common errors:
- Joints too narrow (under 6mm)
- Joints too wide (over 25mm without backing)
- Uneven joint width
- Three-sided adhesion (no backing in deep joints)
Pourquoi c'est important :
- Narrow joints don’t accommodate movement
- Wide joints lack proper depth ratio
- Three-sided adhesion causes stress concentration
- Poor geometry leads to premature failure
The fix:
- Maintain 6-12mm joint width for most applications
- Use backer rod for joints deeper than 12mm
- Aim for 2:1 width-to-depth ratio
- Ensure two-sided adhesion only
7. Maintenance: Keeping Your Shower Caulk Looking Great
Proper care extends service life and maintains appearance.
Regular Cleaning Routine
Preventing buildup is easier than removing it.
Weekly cleaning:
- Quick wipe-down after each shower (squeegee is helpful)
- Weekly cleaning with mild bathroom cleaner
- Soft sponge or cloth (no abrasives)
- Rinse thoroughly after cleaning
- Dry with towel to prevent water spots
What to avoid:
- Abrasive scrubbers (damage caulk surface)
- Harsh acids (some cleaners too aggressive)
- Ammonia in excess (can affect some silicones over time)
- Leaving cleaner in prolonged contact
Mold prevention:
- Keep bathroom well-ventilated
- Run exhaust fan during and after showers
- Squeegee surfaces to remove standing water
- Consider dehumidifier in very humid climates
- Address any underlying ventilation issues
Deep Cleaning When Needed
Occasional deep cleaning removes stubborn buildup.
For soap scum:
- Commercial lime and soap scum remover
- Baking soda paste (gentle abrasive)
- Vinegar (but rinse quickly—don’t leave on)
- Soft brush for textured caulk surfaces
For mold and mildew:
- Bleach solution (1:10 bleach to water)
- Hydrogen peroxide (3% solution)
- Apply and allow 10-15 minutes contact
- Scrub gently with soft brush
- Rincer abondamment
For stubborn discoloration:
- Commercial mold and mildew removers
- Oxygenated bleach products
- Always test in inconspicuous area first
- Follow product directions carefully
When to Consider Recaulking
Even quality caulk eventually needs replacement.
Inspection schedule:
- Monthly visual checks for problems
- Thorough inspection every 6 months
- Note any changes or developing issues
Signs it’s time to recaulk:
- Cracks or splits in caulk line
- Gaps opening at edges (adhesion loss)
- Persistent mold despite cleaning
- Discoloration that won’t clean off
- Softening or degradation of material
- Water appearing behind fixtures
Expected service life:
- Premium silicone: 20-30+ years
- Standard silicone: 15-20 years
- Acrylic (if mistakenly used): 1-5 years
Preventive replacement:
- Consider proactive replacement at 20 years
- During major bathroom renovation
- When selling home (fresh caulk improves appearance)
8. Shower Caulk FAQ
What type of caulk is 100% waterproof for showers?
100% silicone caulk is the only truly waterproof option for shower applications.
Why silicone is waterproof:
- Hydrophobic molecular structure repels water
- Doesn’t absorb moisture like organic materials
- Maintains integrity in continuous water contact
- Tested and proven in decades of bathroom applications
Other options and their limitations:
- Acrylic/Latex: Water-resistant only, not waterproof—will fail in showers
- Polyurethane: Good water resistance but not optimal for continuous immersion
- Hybrid: Improved over pure acrylic but still not truly waterproof like silicone
For showers, specify “100% silicone” clearly labeled for kitchen and bath use. Products specifically marketed as “shower and tub caulk” are typically appropriate.
How long does shower caulk last?
Quality silicone shower caulk lasts 20-30+ years with proper installation and maintenance.
Factors affecting lifespan:
Positive factors:
- Using premium 100% silicone
- Thorough surface preparation
- Technique d'application appropriée
- Regular cleaning and maintenance
- Good bathroom ventilation
Negative factors:
- Using acrylic instead of silicone (1-5 years max)
- Poor surface prep or application
- Inadequate ventilation (accelerates mold)
- Harsh cleaning practices
- Underlying water leaks
Typical lifespans by product type:
- Premium anti-mold silicone: 25-30+ years
- Silicone standard : 15-25 years
- Acrylic caulk: 1-5 years (often fails within 18 months)
Recaulking signs: Even quality silicone eventually needs replacement when you notice persistent mold, adhesion loss, cracking, or discoloration that won’t clean.
Can you use regular caulk in a shower?
No—”regular” caulk (typically acrylic latex) fails rapidly in shower environments.
Why regular caulk doesn’t work:
Not waterproof: Regular caulk is only water-resistant, adequate for occasional moisture but not constant water contact.
Mold vulnerability: Without anti-microbial additives, standard caulk becomes a mold magnet in humid shower conditions.
Poor flexibility: Temperature changes and substrate movement cause rigid caulk to crack.
Chemical susceptibility: Bathroom cleaners degrade non-silicone caulks over time.
Visible failure timeline:
- 0-6 months: May look okay initially
- 6-12 months: Mold spots appear, edges start pulling away
- 12-18 months: Widespread mold, significant adhesion loss
- 18-24 months: Complete failure requiring removal and redo
Always use bathroom-specific silicone caulk for shower applications. The small cost difference (~$5) is trivial compared to the certainty of premature failure with regular caulk.
What is the best mold-resistant caulk for showers?
The best mold-resistant shower caulk features:
Independent certification: Look for products certified to sanitary standards rather than just marketing claims. XS1 sanitary class represents the highest mold resistance level.
Multi-agent biocide system: Premium products use multiple anti-microbial agents (not just one) for comprehensive protection against various mold and mildew species.
Long-lasting protection: The anti-microbial additives should remain effective for the product’s entire service life, not just initially.
Proven performance: Real-world testing and customer reviews over years, not just laboratory results.
Our top recommendation:
BoPin 550 Sanitary Neutral Silicone achieves XS1 highest sanitary class certification with advanced anti-mold technology specifically engineered for wet areas.
Key features:
- XS1 highest sanitary class rating
- Advanced multi-agent biocide system
- Proven performance in challenging environments
- Long-term mold prevention
- Low VOC, MEKO-free formulation
Additional prevention tips:
- Even the best caulk needs proper ventilation
- Regular cleaning prevents organic material buildup
- Good exhaust fan use during and after showers
- Squeegee walls and doors after use
How do you apply caulk to a shower for professional results?
Professional-looking caulk joints require proper technique:
Essential preparation:
- Remove all old caulk completely
- Clean surfaces thoroughly (remove mold, soap scum, oils)
- Allow surfaces to dry 24 hours
- Final wipe with isopropyl alcohol
Technique d'application :
- Use painter’s tape: Mask both sides of joint 3-4mm from edge for clean lines
- Cut nozzle properly: 45-degree angle, size to match joint width
- Apply continuous bead: Steady pressure, consistent speed, fill joint completely
- Tool immediately: Wet finger or tool, smooth in one continuous motion
- Remove tape right away: Pull while caulk is wet, not after it skins over
- Clean excess: Wipe away any excess before it cures
Pro tips:
- Work in 2-3 foot sections for better control
- Use soapy water or alcohol on tooling finger/stick
- Keep wet rag handy for cleanup
- Don’t tool multiple times—one smooth pass is best
- Allow 24-48 hours cure before water exposure
Common mistakes to avoid:
- Overfilling the joint (creates bulging appearance)
- Multiple tooling passes (makes it worse, not better)
- Waiting too long to tool (caulk skins over)
- Forgetting to remove tape promptly
- Using shower before adequate cure time
Result: With proper technique, your caulk joints will look professionally installed and last for decades.
Conclusion: Invest in Quality for Long-Term Peace of Mind
Choosing the right shower caulk isn’t complicated once you understand the essential requirements.
The key principles are straightforward:
Always use 100% silicone: Nothing else provides the waterproofing, flexibility, and longevity that shower applications demand. The alternatives cost less initially but fail prematurely.
Prioritize mold resistance: Look for products with certified anti-microbial protection, not just marketing claims. XS1 sanitary class certification provides independent verification of superior mold resistance.
Don’t skip surface preparation: The time invested in complete old caulk removal and thorough cleaning ensures decades of reliable performance. Shortcuts here guarantee premature failure.
Apply with proper technique: Painter’s tape, proper tooling, and adequate cure time make the difference between amateur and professional results.
The modest investment in premium products pays dividends through reduced maintenance, better appearance, and avoiding the expensive redo work that inferior products necessitate.
Your shower caulk choice directly affects:
- Water damage prevention and home protection
- Mold and mildew control for healthy indoor air
- Bathroom appearance and cleanliness
- Long-term maintenance costs
- Time spent on bathroom upkeep
A quality silicone installation completed today should still be performing reliably 20-30 years from now, outlasting multiple generations of fixtures and finishes.
Professional Shower Sealing Solutions from BoPin
BoPin Construction Chemicals provides premium silicone solutions specifically engineered for demanding wet area applications:
For standard shower and bath applications: BoPin 550 Sanitary Neutral Silicone – XS1 highest sanitary class with advanced anti-mold technology, rapid waterproofing (30 minutes), and superior chemical resistance. The professional choice for reliable shower sealing.
For natural stone showers: BoPin 635 Natural Stone Silicone – ASTM C1248 tested non-staining formula safe for marble, granite, limestone, and travertine. Prevents the discoloration that standard silicones can cause on porous stone.
For general bathroom applications: BoPin 122 Silicone neutre à usage général – Versatile MEKO-free formulation with excellent weather resistance for both interior and exterior bathroom sealing needs.
Need expert guidance for your specific project? Our technical team provides professional support for product selection and application planning.
Contacter l'assistance technique →
BoPin Construction Chemicals – Professional sealing solutions with expert technical support. When shower performance and longevity matter, specify products engineered specifically for wet area applications.
Quality Commitment: Our bathroom sealants are formulated with premium anti-microbial packages and tested under real-world conditions to ensure they deliver the mold-free performance and long-term durability that bathroom applications demand. We stand behind our products with comprehensive technical support and application guidance.