Expert guidance from BoPin Construction Chemicals – protecting your kitchen investment
The Finishing Touch That Protects Your Investment
You’ve just installed beautiful new quartz or granite countertops. The cabinets are in. The backsplash is up. Everything looks perfect.
Except for one final detail.
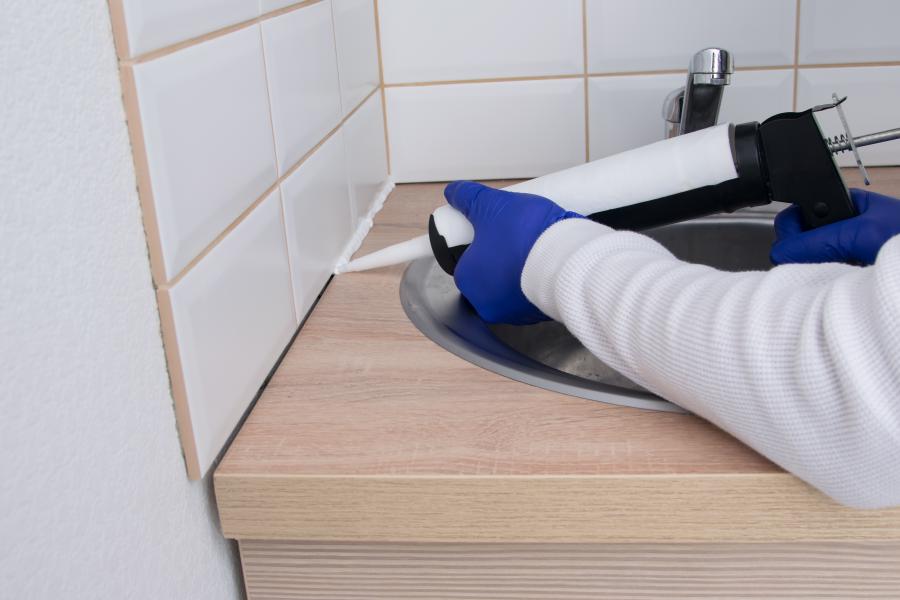
The joint between your counter and backsplash needs sealing. This small bead of caulk does a huge job: it prevents water damage, stops crumbs and debris, and provides a clean, professional finish.
Get it right, and your kitchen will look flawless for decades. Get it wrong, and it can ruin the entire look—or worse, allow water to damage your expensive surfaces and the structure behind them.
This guide will show you the professional method. We’ll explain exactly what type of caulk to use for any countertop material. And we’ll provide a step-by-step guide to achieving a perfect, nearly invisible seal.
The result? The confidence to complete your kitchen project with a finish that looks like it was done by a pro.
1. The #1 Rule: Why You MUST Use 100% Silicone
Let’s start with the most critical piece of advice: The joint between your countertop and wall requires 100% silicone sealant. Nothing else will work long-term.
Understanding the Challenge
The joint between a countertop and backsplash faces unique stresses. Houses settle over time. Temperature changes cause materials to expand and contract at different rates.
Your countertop is often stone or engineered material. Your wall might be drywall, tile, or another surface. These materials move differently, creating dynamic stress on whatever seals them together.
Add water exposure, cleaning chemicals, and daily kitchen use, and you have one of the most demanding sealing applications in your home.
The Wrong Choices (And Why They Fail)
Grout in this joint is a mistake. Many people see the gap and think, “I’ll just grout this like the rest of my tile.”
Grout is rigid. It cannot flex with movement. Within months, that grout line will crack, creating an entry point for water and looking unsightly.
Standard acrylic “painter’s caulk” will fail quickly. These products are designed for trim work and static joints. They’re not truly waterproof. They don’t have the flexibility required for countertop applications.
When exposed to water and movement, acrylic caulk shrinks, cracks, and pulls away from surfaces. You’ll be redoing the job within a year.
Even “kitchen and bath” caulks with acrylic bases don’t provide the performance you need for this critical joint. The packaging may say they’re waterproof, but they lack the permanent flexibility that only silicone chemistry provides.
The Right Choice: 100% Silicone
Only 100% silicone sealant has the combination of properties this joint demands:
Permanent flexibility: Silicone remains elastic throughout its service life. It stretches and compresses with building movement without cracking or losing adhesion.
True waterproofing: Silicone is hydrophobic by nature. Water beads up on the surface rather than being absorbed. This prevents moisture from penetrating to the substrate.
Excellent adhesion: Quality silicone bonds strongly to all common countertop materials including granite, marble, quartz, laminate, and tile.
Chemical resistance: Kitchen cleaning products, oils, and acids won’t degrade silicone’s performance or appearance.
Temperature stability: From freezer cold to boiling water hot, silicone maintains its properties without becoming brittle or soft.
This is non-negotiable. For countertop-to-backsplash joints, always specify 100% silicone sealant.
2. Buyer’s Guide: What to Look For in the “Best” Countertop Caulk
Not all 100% silicone sealants are created equal. Understanding quality markers helps you select products that will perform and look great for years.
Your Quality Checklist
✓ 100% Silicone Chemistry
This is your starting point. The product must be 100% silicone, not a “silicone blend” or “siliconized” product. These marketing terms usually indicate acrylic products with small amounts of silicone added.
Look for “100% Silicone” or “Pure Silicone” clearly stated on the tube. Check the technical specifications to confirm.
✓ Neutral Cure Formula
Silicone sealants cure through two different chemistry types:
Acetoxy cure (smells like vinegar) cures faster but releases acetic acid. This acid can corrode metals and stain certain natural stones like marble and limestone.
Neutral cure (little to no odor) costs slightly more but provides universal compatibility. It won’t damage any countertop material, including sensitive natural stones.
For countertops, neutral cure is the professional’s choice. The slight additional cost is worth the peace of mind.
✓ Mold-Free Product Protection
Kitchens are humid environments. The area behind your sink and along the backsplash sees regular moisture exposure.
Without mold protection, your beautiful white caulk line can develop black mold stains within months. This looks terrible and is difficult to clean effectively.
Look for products with “mold-free protection,” “anti-fungal,” or “mildew-resistant” prominently listed. These products contain biocides that prevent mold and mildew growth.
The best products guarantee mold-free performance for the life of the sealant.
✓ Non-Staining Formula
This is critical if you have natural stone countertops or backsplashes.
Some silicone formulations can migrate into porous stone materials, causing discoloration or dark shadows around the joint. This “staining” is permanent and can ruin expensive stone installations.
Products labeled “stone-safe,” “non-staining,” or “suitable for natural stone” have been specifically formulated to prevent this migration.
If you have marble, granite, travertine, or limestone, verify the sealant is certified non-staining. Look for testing to standards like ASTM C1248.
✓ The Right Color
Color choice significantly impacts the final appearance. We’ll cover this in detail in the next section, but verify your chosen product offers the color you need.
Quality manufacturers offer extensive color ranges including clear, white, and multiple shades to match popular grout colors.
3. Choosing the Right Color: Clear vs. White vs. Color-Matched
Color selection is where art meets function. The right choice makes your caulk line nearly invisible, creating a seamless, professional appearance.
When to Use Clear Silicone
Clear is the invisible choice that works beautifully with busy patterns and multi-colored surfaces.
Best applications:
- Busy granite with multiple colors and patterns
- Patterned quartz countertops
- Decorative tile backsplashes with varied colors
- Any time you want the caulk line to visually disappear
The advantage: Clear caulk recedes visually, allowing the materials on both sides to dominate. Your eye sees the countertop and backsplash, not the joint between them.
Important note: Clear silicone can show dirt and dust more readily than pigmented versions. It requires slightly more diligent cleaning to maintain its invisible appearance.
When to Use White Silicone
White is the classic choice that creates clean, crisp lines in monochromatic designs.
Best applications:
- White quartz countertops with white subway tile
- White ceramic tile to white backsplash
- Bright, clean, modern kitchen aesthetics
- When you want a defined but complementary line
The advantage: White creates a deliberate design line that feels intentional and finished. It complements white materials while maintaining visual separation.
Consider the shade: “White” varies between products. Some are bright white, others are cream or off-white. If matching is critical, obtain samples before committing to your full project.
When to Use Color-Matched Silicone
Color matching is the ultimate professional technique that creates truly integrated, seamless transitions.
The concept: Match your silicone color to your grout color or dominant countertop/backsplash tone.
Best applications:
- Gray grout with gray tile—use gray silicone
- Beige travertine—use matching beige silicone
- Colored quartz—use complementary silicone shade
- Any time you want the joint to completely disappear
The advantage: When the caulk line matches the surrounding materials, it becomes virtually invisible. Your eye cannot distinguish where one material ends and another begins.
Professional tip: Bring a grout sample or photo to match colors accurately. Natural light can reveal color differences that fluorescent store lighting hides.
The Backsplash Tile Consideration
If your backsplash is tile with visible grout lines, your caulk color choice becomes even more important.
Matching the grout color creates visual continuity. The caulk line looks like an extension of your grout lines—intentional and integrated.
Contrasting with the grout (like using white caulk with gray grout) creates a visible seam that may draw unwanted attention.
4. Our Recommended Solutions: Professional-Grade Products for Every Countertop
BoPin Construction Chemicals offers premium silicone sealants specifically engineered for kitchen and bath applications including countertop sealing.
For Natural Stone Countertops: BoPin 635 Natural Stone Silicone
BoPin 635 Natural Stone Silicone Sealant is specifically formulated for marble, granite, limestone, travertine, and engineered stone.
Why It’s the Best Choice for Stone Countertops:
Guaranteed Non-Staining Formula: Tested to ASTM C1248 standards to ensure no edge discoloration or migration into porous stone materials. This is critical protection for expensive stone installations where staining could cause permanent damage.
Superior Stone Adhesion: Exceptional bonding to all natural stones without requiring primers. Works on polished, honed, and textured stone finishes.
Advanced Mold Resistance: Prevents fungal growth on sealed joints even in high-moisture areas behind sinks and near stove areas.
High Movement Capability (±25%): Accommodates thermal expansion from cooking heat and structural movement from building settling.
Extensive Color Range: Available in Clear, White, Grey, Black, Manhattan (warm beige), and Travertine to complement virtually any stone installation.
Technical excellence:
- Neutral alkoxy cure (safe for all materials)
- Temperature resistance: -40°C to +120°C
- Quick skin formation (15-25 minutes)
- Low VOC content (<40 g/L)
Applications:
- Kitchen countertop perimeter sealing
- Stone backsplash joints
- Bathroom vanity top edges
- Stone window sills and thresholds
For General Kitchen Applications: BoPin 550 Sanitary Silicone
BoPin 550 Sanitary Neutral Silicone provides exceptional performance for kitchen and bath sealing with emphasis on hygiene and mold resistance.
Why Professionals Choose BoPin 550:
Advanced Anti-Mold Technology: XS1 highest sanitary class rating provides superior resistance to mold and fungus growth. Keeps seals clean and pristine even in challenging kitchen environments.
Rapid Waterproofing: Creates effective water barrier within 30 minutes, allowing faster project completion.
Chemical Resistance: Withstands household cleaning products, kitchen degreasers, and food acids without degradation or discoloration.
Stone-Safe Formula: Can be safely used on natural stone surfaces without causing discoloration concerns.
MEKO-Free Composition: Environmentally safer formulation with low VOC content suitable for green building requirements.
Available Colors: Clear, White, Grey, Manhattan (Jasmine), Black
Technical performance:
- Neutral oxime cure system
- Excellent flexibility (>500% elongation)
- Temperature resistance: -40°C to +120°C
- ±25% movement capability
Ideal for:
- Kitchen countertop and backsplash sealing
- Sealing around sinks and fixtures
- Bathroom vanity installations
- Any wet area sealing application
Which Product Should You Choose?
Use BoPin 635 when:
- Working with natural stone (marble, granite, travertine, limestone)
- Non-staining certification is critical
- You need specific stone-matching colors
- Maximum stone compatibility is the priority
Use BoPin 550 when:
- Working with quartz, laminate, or tile
- Maximum mold resistance is the priority
- Rapid waterproofing timeline matters
- You need highest sanitary classification
Both products provide:
- 100% silicone performance
- Neutral cure safety
- Excellent flexibility and durability
- Multiple color options
- Professional-grade quality
5. How to Get a Perfect, Invisible Seam: A 6-Step Pro Guide
Professional-looking results come from meticulous technique. Follow this proven process for a flawless finish.
What You’ll Need
Materials:
- Your chosen 100% silicone sealant
- High-quality painter’s tape (1-inch or wider)
- Silicone removal tool or sharp utility knife
- Isopropyl alcohol or denatured alcohol
- Clean, lint-free rags
- Caulk gun (professional ratcheting type)
Optional but helpful:
- Caulk finishing tool or small spoon
- Spray bottle with soapy water solution
- Rubber gloves
Step 1: The Perfect Prep—Surface Preparation
This step determines 80% of your success. Never skip or rush surface preparation.
Remove all old sealant completely. Use a sharp utility knife or specialized silicone removal tool to cut away every bit of old material. Silicone won’t bond to old silicone, so thorough removal is critical.
Clean both surfaces with alcohol. Wipe the countertop edge and backsplash surface with isopropyl alcohol on a clean rag. This removes oils, soap residue, and any remaining contamination.
Let surfaces dry completely. Even slight moisture prevents proper adhesion. In humid climates, consider using a hair dryer to ensure complete dryness.
Verify the joint is properly sized. The gap should be 3-6mm (1/8″ to 1/4″) for optimal performance. Wider gaps may require backer rod.
Step 2: Mask for Perfect Lines
Painter’s tape creates professional, crisp edges that would be impossible to achieve freehand.
Position tape on the countertop about 3-4mm (1/8″) from the edge. Press firmly to seal, especially at the edge closest to where the caulk will be applied.
Position tape on the backsplash the same distance from the corner. Ensure both tape lines are parallel and consistent along the entire length.
The space between the tape lines defines your caulk bead width. Most countertop joints look best with 6-8mm (1/4″ to 3/8″) visible bead width.
Press all edges firmly, especially where the tape meets the surfaces you’re sealing. Any gaps under the tape allow caulk to seep beneath, creating a messy edge.
Step 3: Apply a Small, Consistent Bead
Less is more with silicone sealant. Too much creates a bulging, unnatural appearance and wastes material.
Cut the nozzle at a 45-degree angle sized to match your joint width. Start with a smaller opening—you can always enlarge it, but you can’t make it smaller.
Hold the gun at a consistent angle (typically 45 degrees to the joint) as you apply.
Apply steady, even pressure while moving at a consistent speed. The goal is a uniform bead size along the entire length.
Fill the joint completely but don’t overfill. The bead should be slightly proud of the surfaces but not bulging dramatically.
Work in manageable sections of 3-4 feet if you’re new to this. Experienced applicators can work longer sections before tooling.
Step 4: Tool the Bead Immediately
Tooling shapes the sealant and forces it into full contact with both surfaces, ensuring complete adhesion and waterproofing.
Work quickly after application. Silicone begins skinning over within 10-20 minutes. Once a skin forms, tooling becomes difficult and results worsen.
Use a caulk finishing tool, wet finger, or the back of a spoon. Whatever you use, it should be smooth and slightly concave.
Apply light to moderate pressure while drawing the tool along the joint in one smooth, continuous motion. Don’t stop mid-section.
The goal is a slight concave profile that sheds water and creates a professional appearance.
Wipe your tool clean between passes if doing multiple sections. Excess buildup on the tool prevents smooth results.
For a ultra-smooth finish, lightly mist your finger or tool with soapy water solution. This prevents sticking and creates a glass-smooth surface.
Step 5: Remove Tape Immediately
This is the critical timing step that many DIYers get wrong.
Pull the tape away immediately after tooling, while the silicone is still wet. Don’t wait for it to cure.
Pull at a 45-degree angle away from the sealant bead. Pull slowly and steadily—not jerking.
If you wait too long, the curing silicone bonds to the tape. When you finally pull the tape, it tears the edge of your sealant, creating a ragged, unprofessional appearance.
If you pull too early (before tooling), the sealant may pull and distort when you tool it.
The sweet spot is: Tool completely, then immediately pull tape.
Step 6: Clean Up and Cure
Final details make the difference between good and professional results.
Inspect your work immediately. Look for any gaps, thin spots, or imperfections. Fix them now while the silicone is still workable.
Clean any smears or residue from adjacent surfaces immediately with a clean rag. Once silicone cures, removal becomes difficult.
Don’t touch or disturb the sealant for at least 24 hours. It needs this time to cure properly.
Avoid water exposure for 24-48 hours. While silicone skins over quickly, full waterproofing develops over the first day or two of curing.
Full cure takes 7-14 days for maximum strength and chemical resistance, though the joint is serviceable much sooner.
Ventilate the area during curing, though neutral cure silicone produces minimal odor.
6. Countertop Caulk FAQ
Should I caulk or grout between the countertop and backsplash?
Always caulk. Never grout. This is one of the most common mistakes in kitchen finishing.
Why caulk is essential:
The joint between countertop and backsplash is a movement joint. Houses settle. Materials expand and contract with temperature changes. Your countertop moves independently from the wall behind it.
Caulk is flexible. It accommodates this movement without cracking.
Why grout fails:
Grout is rigid. It’s designed for stable joints between tiles where movement is minimal.
When you grout this movement joint, the grout cracks within months. Those cracks allow water penetration and look terrible.
But what if I’m grouting my backsplash tile?
Grout the tile joints—those are stable. Use caulk (color-matched to your grout if possible) for the bottom row where tile meets countertop.
This provides a flexible joint that looks like a grout line but performs like the movement joint it needs to be.
Professional verification:
Ask any experienced tile installer. They’ll confirm: change planes (horizontal to vertical) require caulk, not grout. This is standard practice in professional installations.
How long does it take for kitchen caulk to dry?
Understanding cure stages helps you plan your project timeline.
Skin formation: 10-25 minutes
The surface develops a skin that you can touch without transferring material to your finger. This doesn’t mean it’s cured—just that the surface has started reacting with moisture in the air.
Tack-free surface: 2-4 hours
The surface is dry enough that you won’t leave fingerprints, but the sealant underneath is still curing.
Light use: 24 hours
After 24 hours, the sealant has developed sufficient strength for light use. You can carefully wipe the area and place items on the counter.
Water exposure: 24-48 hours
Wait a full day (preferably two) before subjecting the joint to water exposure. This allows adequate waterproofing properties to develop.
Full cure: 7-14 days
Complete cure with maximum strength and chemical resistance takes 1-2 weeks. During this time:
- Avoid harsh cleaning chemicals
- Don’t scrub the caulk line aggressively
- Be gentle during cleaning activities
Variables affecting cure time:
Humidity: Higher humidity accelerates cure. Low humidity slows it.
Temperature: Warmer temperatures cure faster. Cold conditions slow curing significantly.
Bead thickness: Thick beads cure slowly from outside to inside. Thin beads cure more uniformly and quickly.
Ventilation: Good air circulation helps cure progression.
Plan accordingly: If you’re doing this work before a gathering or event, allow at least 3-4 days for adequate cure and to be safe.
What’s the best way to remove old caulk from a granite countertop?
Removing old caulk requires patience and the right technique to avoid damaging your expensive stone surfaces.
Step-by-step removal process:
1. Soften the old caulk (if possible)
Some silicone removal products can soften old sealant, making it easier to cut away. Apply according to product directions and allow appropriate dwell time.
Note: These products don’t “dissolve” silicone—they soften it for easier mechanical removal.
2. Score and cut carefully
Use a sharp utility knife or specialized caulk removal tool to cut along both edges of the old caulk bead.
Hold the blade nearly parallel to the surface to avoid scratching. Make multiple shallow passes rather than one deep cut.
Work carefully around the old bead to separate it from both the countertop and backsplash.
3. Pull away the bulk material
Once scored, the old caulk bead should peel away in sections. Pull gently and steadily.
Some stubborn areas may require additional cutting. Be patient—forcing it risks damaging the stone.
4. Remove residual silicone
After removing the bulk material, residual silicone film often remains on the stone surface.
For granite and other hard, polished stones:
- Try rubbing with a clean rag and isopropyl alcohol
- Use a plastic scraper (never metal) held flat against the surface
- A specialized silicone residue remover may help
5. Clean thoroughly
Once all visible silicone is removed, clean the area thoroughly with isopropyl alcohol to remove any remaining residue and oils.
6. Verify dryness
Let the cleaned surfaces dry completely before applying new sealant.
Special considerations for granite:
Never use metal scrapers or razor blades held vertically against polished granite. While granite is hard, you can still scratch the polish.
Avoid harsh solvents that might affect the stone’s sealant or finish. Stick with isopropyl alcohol or specialized stone-safe products.
Test any chemical in an inconspicuous area first if you’re uncertain about compatibility.
For other stone types:
Marble and limestone are softer and more easily damaged. Use extra caution and gentler techniques.
Honed or textured finishes hide minor scratches better than high-polish surfaces, but careful technique is still important.
Can I use the same caulk on quartz countertops as granite?
Yes, but understanding the differences helps you optimize product selection.
Similarities:
Both quartz and granite require:
- 100% silicone sealant for flexibility and waterproofing
- Neutral cure formula for universal compatibility
- Mold-resistant formulation for kitchen environments
- Color matching capability for aesthetic integration
Key differences:
Quartz (engineered stone):
- Non-porous surface with consistent properties
- No staining concerns since it’s a manufactured product
- Generally more uniform in color and pattern
- Slight flexibility in product selection
Granite (natural stone):
- Natural stone with some porosity (even when sealed)
- Staining risk if using wrong sealant formulation
- Natural variation in color and pattern
- Requires verified non-staining certification
Product recommendations:
For quartz: Either BoPin 550 Sanitary Silicone or BoPin 635 Natural Stone Silicone work excellently. Choose based on color preference and mold resistance priority.
For granite: Use BoPin 635 Natural Stone Silicone for guaranteed non-staining performance and stone compatibility.
The safe choice: When in doubt, use a product certified for natural stone (like BoPin 635). It works perfectly on quartz while providing the extra protection granite requires.
How do I match caulk color to my grout?
Color matching creates professional, integrated appearances but requires careful selection.
Strategy 1: Bring samples
Take a grout sample or high-quality photo to your supplier. Many stores have sample displays where you can compare colors in person.
Strategy 2: Use manufacturer color charts
Quality sealant manufacturers provide detailed color charts showing actual cured sealant colors. Request these before purchasing.
Strategy 3: Test first
If perfect matching is critical:
- Purchase small tubes of potential matches
- Apply small test beads in inconspicuous areas
- Let them cure fully (colors can shift slightly during curing)
- Compare in natural light and artificial light
Important considerations:
Wet vs. dry color: Silicone color when first applied differs from cured color. Always judge cured samples.
Lighting matters: Colors appear different in natural daylight vs. kitchen artificial lighting. Check in both conditions.
Perfect matching is difficult: Even when colors look identical, slight differences in gloss level (silicone is typically more glossy than grout) can make them appear different.
Close is often better than exact: A color that’s close but not perfect often looks better than trying for an exact match that falls slightly short. The slight difference looks intentional.
Professional tip: For gray grouts, slightly lighter gray caulk often appears more integrated than trying for an exact match.
Conclusion: The Finishing Touch that Protects and Perfects
A properly executed caulk line between your countertop and backsplash does far more than fill a gap. It protects your investment from water damage. It prevents debris accumulation. And it provides a clean, finished appearance that elevates your entire kitchen.
The keys to success are surprisingly straightforward:
Use the right product: 100% silicone sealant with neutral cure, mold resistance, and appropriate color selection.
Prepare meticulously: Complete removal of old material and thorough cleaning determine long-term success.
Apply with precision: Painter’s tape creates clean lines that look professional. Proper tooling ensures waterproof performance.
Allow proper cure: Patience during the first 24-48 hours prevents premature failure.
Your countertops represent a significant investment in your kitchen’s beauty and functionality. Protect them with a seal that’s worthy of the surfaces it joins.
Protect your beautiful countertops with sealants engineered for lasting performance. Explore BoPin’s complete line of professional-grade Kitchen & Bath silicones designed to preserve your investment and enhance your home’s beauty.
BoPin Construction Chemicals – Professional sealing solutions with expert guidance. When your countertops deserve the best, choose products engineered for lasting beauty and protection.